Few things satisfy a steak lover like a perfectly cooked NY strip steak. Known for its rich marbling, bold flavor, and tender texture, this classic cut is a favorite on steakhouse menus and backyard grills alike. But you don’t need a reservation or a professional kitchen to enjoy a restaurant-quality steak at home. With the right techniques, ingredients, and timing, you can elevate your cooking and bring out the best in this premium cut.
In this post, we’ll share 5 expert tips for making the best NY strip steak, so you can serve up juicy, flavorful results every time—whether you’re pan-searing, grilling, or broiling. Let’s dive into the steak secrets that make all the difference.
Choosing the Right NY Strip Steak
Understand Steak Grades (USDA Prime vs. Choice)
When buying a NY strip steak, one of the first things to pay attention to is the grade of beef—a factor that significantly affects the steak’s tenderness, juiciness, and flavor. In the United States, the USDA (United States Department of Agriculture) assigns grades to beef based on marbling (the fat within the muscle) and overall quality. The two most common grades you’ll find at grocery stores and butcher shops are USDA Prime and USDA Choice.
USDA Prime
- This is the highest grade of beef, typically found in high-end restaurants and specialty butchers.
- Prime steaks have abundant marbling, which melts during cooking, keeping the steak moist and flavorful.
- If you’re aiming for a restaurant-quality NY strip steak, USDA Prime is the gold standard.
USDA Choice
- Choice-grade steaks are slightly leaner but still offer excellent quality and flavor.
- They have moderate marbling, making them a solid option for everyday cooking, especially if you’re on a budget.
- With the right cooking technique, a USDA Choice NY strip steak can still deliver an incredibly satisfying result.
Expert Tip:
If you’re unsure which grade to pick, look at the marbling in the meat. White flecks of fat evenly distributed throughout the steak (not just around the edges) are a good sign of quality. Even within the same grade, marbling can vary from cut to cut.
Choosing the right grade is your first step to steakhouse success at home. Whether you opt for Prime or Choice, the way you handle and cook your NY strip steak next will make all the difference.
Go Thick for Better Results
When it comes to cooking the perfect NY strip steak, thickness matters more than you might think. While thinner cuts may be tempting for their quicker cook time, thicker steaks—ideally around 1.25 to 1.5 inches—offer far better control over the cooking process and deliver superior results in both texture and flavor.
Why Thicker is Better:
- More Forgiving with Temperature: A thicker NY strip steak gives you a larger margin for error, especially when aiming for the perfect medium rare or medium doneness. It allows the inside to cook gently without overcooking the outside.
- Better Sear, Juicier Center: With enough thickness, you can create a beautiful crust on the outside (thanks to the Maillard reaction) while keeping the interior juicy and tender.
- Ideal for Advanced Methods: Thicker steaks are perfect for techniques like reverse searing, where the steak is first cooked slowly and then finished with a high-heat sear for maximum flavor and control.
Cooking Tip:
If your NY strip steak is under 1 inch thick, it’s much easier to accidentally overcook it, turning a tender cut into a dry, chewy bite. Instead, choose a thick-cut strip steak from the butcher or ask for one custom-cut to about 1.5 inches for optimal results.
In short, going thick is a simple but game-changing step that separates amateur steak from restaurant-quality NY strip steak—so don’t skimp on the cut.
Let the ny strip steak Reach Room Temperature
One of the most overlooked—but essential—steps in cooking the perfect NY strip steak is letting the meat come to room temperature before it hits the heat. While it might seem like a minor detail, this simple step can make a big difference in how evenly your steak cooks and how juicy it turns out.
Why Room Temperature Matters:
- Even Cooking: A cold steak straight from the fridge will cook unevenly. The outer layer may overcook before the center reaches your desired doneness. Letting the steak rest at room temperature helps ensure the entire piece of meat cooks more uniformly.
- Better Sear: When the steak isn’t chilled, it browns more quickly in the pan or on the grill. This encourages a better Maillard reaction (the crust-building process that brings flavor and texture), without overcooking the inside.
- More Predictable Results: Starting with a steak at room temperature makes it easier to control cooking time, especially if you’re aiming for precise doneness like medium rare (around 130–135°F internal temp).
How Long Should You Let It Sit?
Take your NY strip steak out of the fridge about 30 to 45 minutes before cooking. Place it on a plate and loosely cover it with foil or paper towel. During this time, you can also season it with kosher salt to start dry-brining for added flavor and tenderness.
Letting your steak rest before cooking is a small step that leads to a big upgrade in quality. It’s the kind of trick pros swear by—and now, so can you.
Mastering the Cooking Method
Use a Cast Iron Skillet or Grill
Choosing the right cooking surface is crucial when preparing a NY strip steak, and two of the most effective tools for the job are a cast iron skillet and a grill. Each method has its unique benefits, and both can help you achieve that mouthwatering sear and juicy interior that define a perfectly cooked steak.
Cast Iron Skillet: The Indoor Favorite
- A cast iron skillet is a top choice for indoor cooking because it retains heat extremely well and distributes it evenly across the surface.
- This high, consistent heat is essential for developing a deep, flavorful crust through the Maillard reaction—the browning process that gives steak its signature rich, umami-packed flavor.
- It also allows you to baste the steak with butter, garlic, and herbs during the final minutes of cooking, creating a restaurant-style finish right on your stovetop.
Pro tip: Preheat the skillet for at least 5 minutes on medium-high heat before adding your steak. A properly heated pan will ensure an instant, satisfying sizzle.
Grill: The Outdoor Classic
- If you’re cooking outside, the grill is your best friend. Whether using charcoal or gas, grilling adds a layer of smoky flavor that a pan simply can’t replicate.
- A grill allows for beautiful crosshatch marks, and you can close the lid to mimic oven-like conditions—perfect for thick-cut NY strip steaks.
- The direct flame also gives you flexibility with two-zone cooking, allowing you to sear over high heat and then finish over indirect heat to control doneness.
Which One Should You Choose?
- If you want maximum control and a steakhouse-style sear, go with the cast iron skillet.
- If you’re looking for a charred, smoky flavor, the grill is your best bet.
No matter which method you choose, make sure your cooking surface is preheated properly and capable of high heat—because that’s the key to transforming a good NY strip steak into a great one.
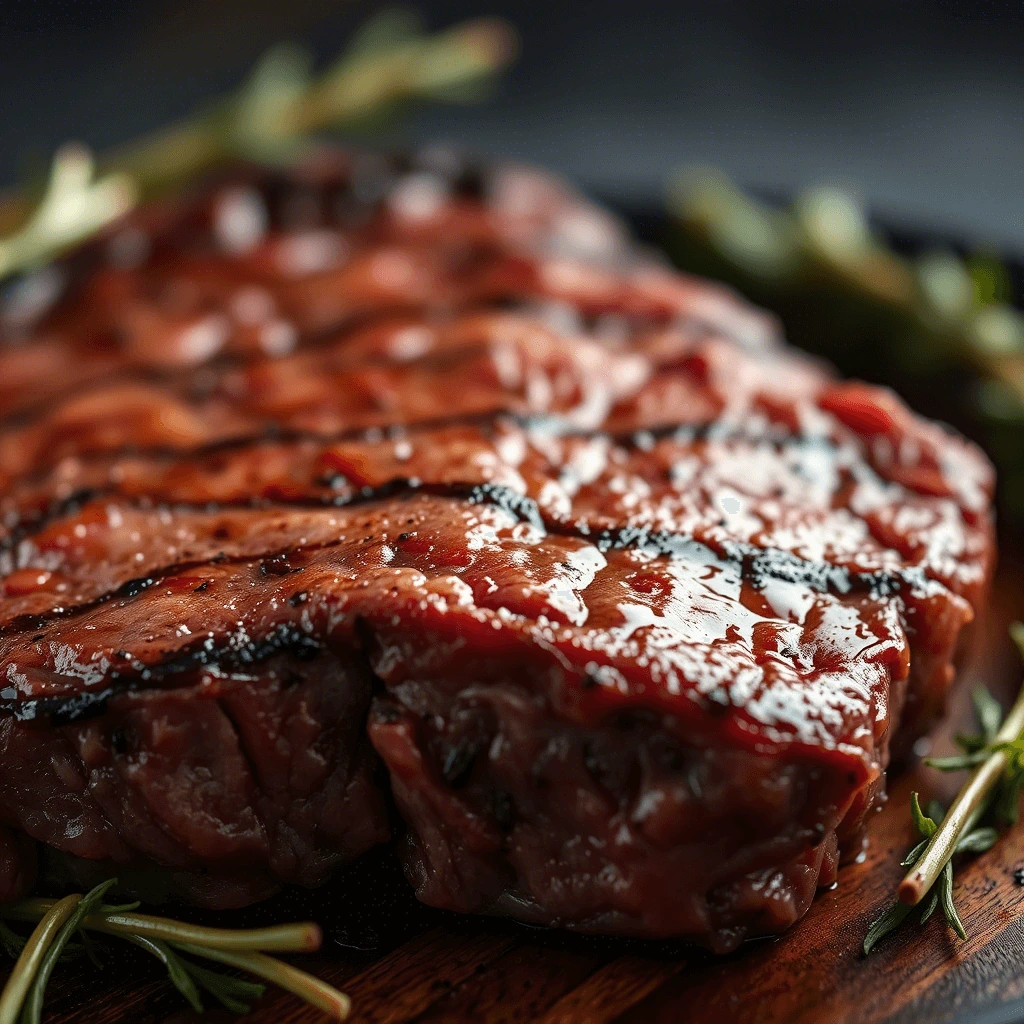
Perfect the Sear with High Heat
If there’s one technique that separates a decent steak from a truly memorable one, it’s the sear. Searing your NY strip steak at high heat is what creates that irresistible crust—deep brown, slightly crisp, and packed with complex, savory flavor. It’s not just about looks—it’s science, and it’s essential.
The Maillard Reaction: Flavor Chemistry in Action
The golden-brown crust on a perfectly seared steak is the result of the Maillard reaction, a chemical process that occurs when proteins and sugars in the meat are exposed to high heat. This reaction creates hundreds of flavorful compounds that give steak its signature richness and umami depth.
To trigger this reaction effectively, your cooking surface—whether it’s a cast iron skillet or a hot grill—needs to be very hot, typically above 400°F (204°C).
How to Get the Sear Just Right
- Dry the steak thoroughly: Moisture is the enemy of a good sear. Pat your NY strip steak dry with paper towels before seasoning.
- Don’t overcrowd the pan or grill: Give your steak plenty of room. Crowding lowers the temperature and causes the meat to steam instead of sear.
- Leave it alone: Once the steak hits the heat, resist the urge to move it. Let it sit untouched for 2–3 minutes on each side (depending on thickness) to develop a true crust.
Optional but Powerful: Baste with Butter
Once the crust is formed, you can reduce the heat slightly and add butter, garlic, and fresh herbs to the pan. Tilt the pan and use a spoon to baste the steak. This enhances both flavor and appearance while keeping the meat moist.
Perfecting the sear is about confidence, heat, and timing. Done correctly, you’ll lock in juices, add layers of flavor, and give your NY strip steak the kind of restaurant-quality finish that impresses every time.
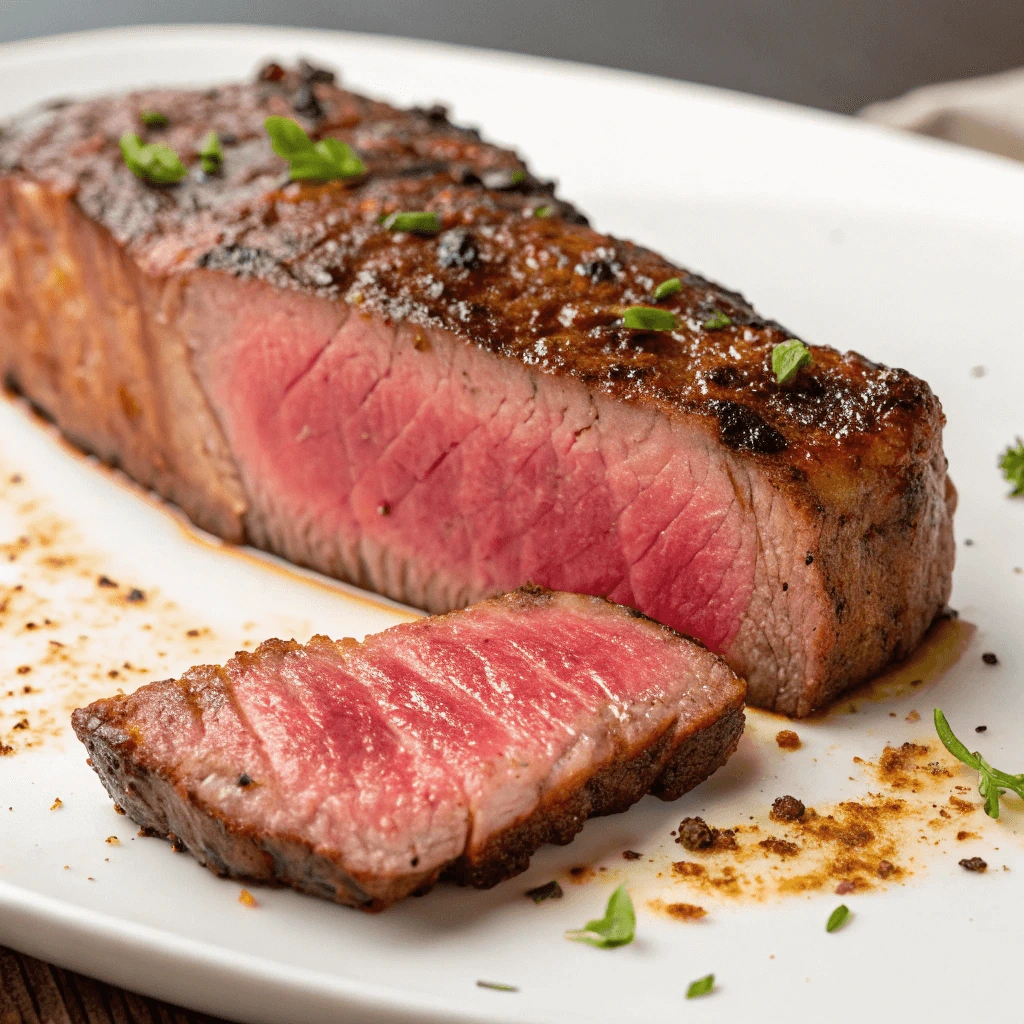
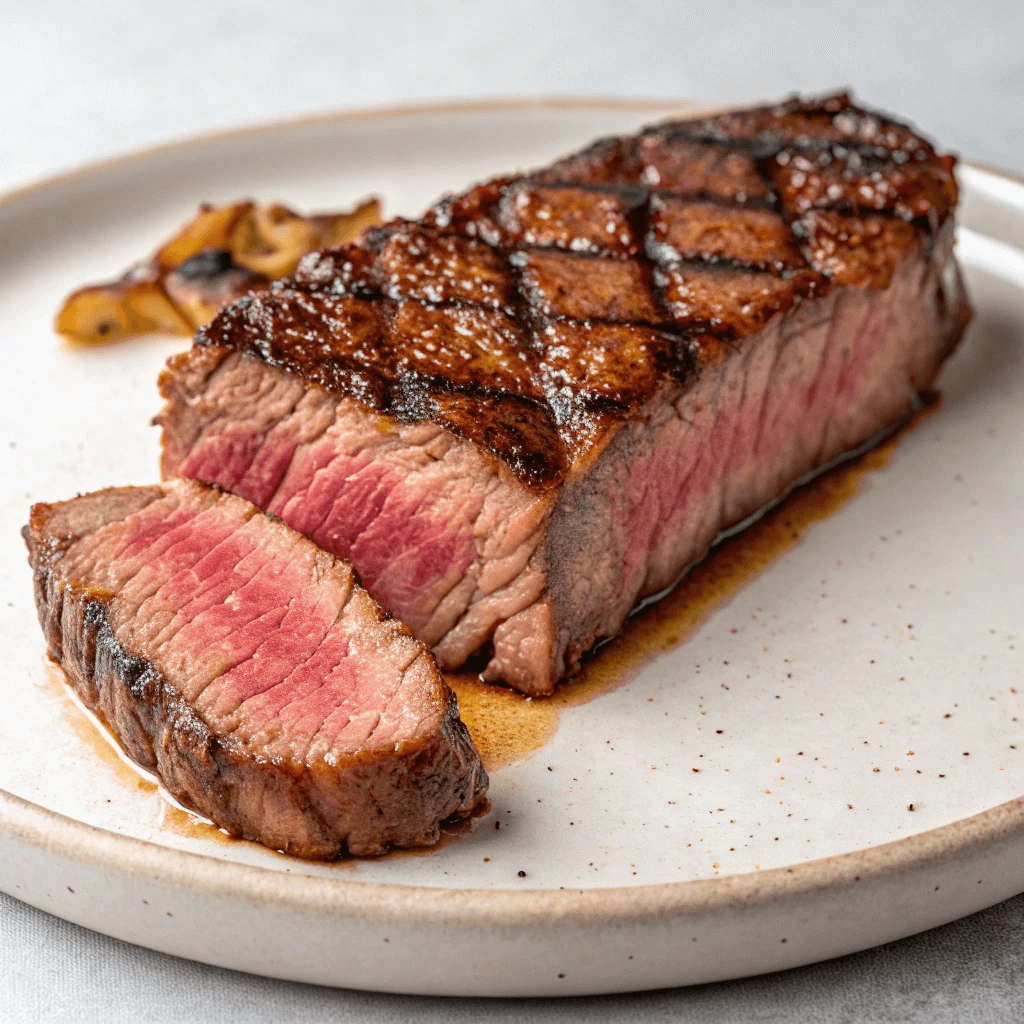
Don’t Skip the Resting Time
You’ve seared your NY strip steak to perfection, the crust is beautifully browned, and the aroma is mouthwatering—so it’s time to dig in, right? Not yet. One of the most crucial steps in steak preparation is also the one most home cooks overlook: resting the steak after cooking.
Why Resting Matters
When a steak cooks, its juices are driven toward the center due to the heat. If you cut into it immediately after removing it from the pan or grill, those flavorful juices will spill out onto the cutting board—leaving your steak dry and less flavorful.
Resting allows the juices to redistribute evenly throughout the meat, so every bite is as juicy and tender as it should be.
How Long Should You Rest a NY Strip Steak?
- Let your steak rest for at least 5–10 minutes after cooking.
- Place it on a plate or wooden cutting board, and loosely tent it with aluminum foil to retain some heat without causing it to steam.
- A good rule of thumb: rest your steak for about 1 minute per 100 grams (3.5 oz).
Bonus Tip:
During the resting period, the internal temperature of your NY strip steak will continue to rise slightly—this is called carryover cooking. If you’re aiming for a specific doneness (e.g., 130°F for medium rare), consider pulling your steak off the heat a few degrees before it hits the target temp. This is especially important if you’re using a meat thermometer.
Resting is a small step that delivers big results—juicier texture, balanced flavor, and a better overall steak experience. So no matter how tempting it is, give your NY strip steak the time it needs to settle. Your taste buds will thank you.
Seasoning and Serving the ny strip steak for Maximum Flavor
Keep It Simple: Salt, Pepper, Olive Oil
When it comes to seasoning a NY strip steak, less is often more. This cut of beef is prized for its bold, beefy flavor and natural marbling, so it doesn’t need a complicated rub or overpowering marinade. Instead, the best approach is to keep it simple—just kosher salt, freshly ground black pepper, and a touch of olive oil are all you need to let the steak’s true flavor shine.
Kosher Salt: The Flavor Enhancer
- Kosher salt is ideal for steaks because of its coarse texture, which clings to the surface of the meat and penetrates more slowly than fine table salt.
- Salt enhances the beef’s natural flavor and helps draw moisture to the surface, which contributes to that perfect, crusty sear.
- Pro tip: Salt the steak at least 30–60 minutes before cooking to start a dry brine. This helps tenderize the meat and deepen the flavor.
Cracked Black Pepper: Just Enough Heat
- Freshly cracked black pepper adds a subtle bite and aromatic warmth without overpowering the steak.
- Add the pepper just before cooking if you’re searing at very high heat—this prevents the pepper from burning and turning bitter.
Olive Oil: A Light Coating for Better Searing
- Rubbing the steak with a thin layer of extra virgin olive oil helps the salt and pepper stick and creates a slightly crispy, caramelized crust when the meat hits the hot pan or grill.
- It also adds a touch of richness and prevents sticking, especially when cooking in a cast iron skillet.
By sticking with just salt, pepper, and olive oil, you’re allowing the premium quality of your NY strip steak to take center stage. These classic ingredients don’t mask the flavor—they enhance it, creating a steak that’s simple, elegant, and absolutely delicious.
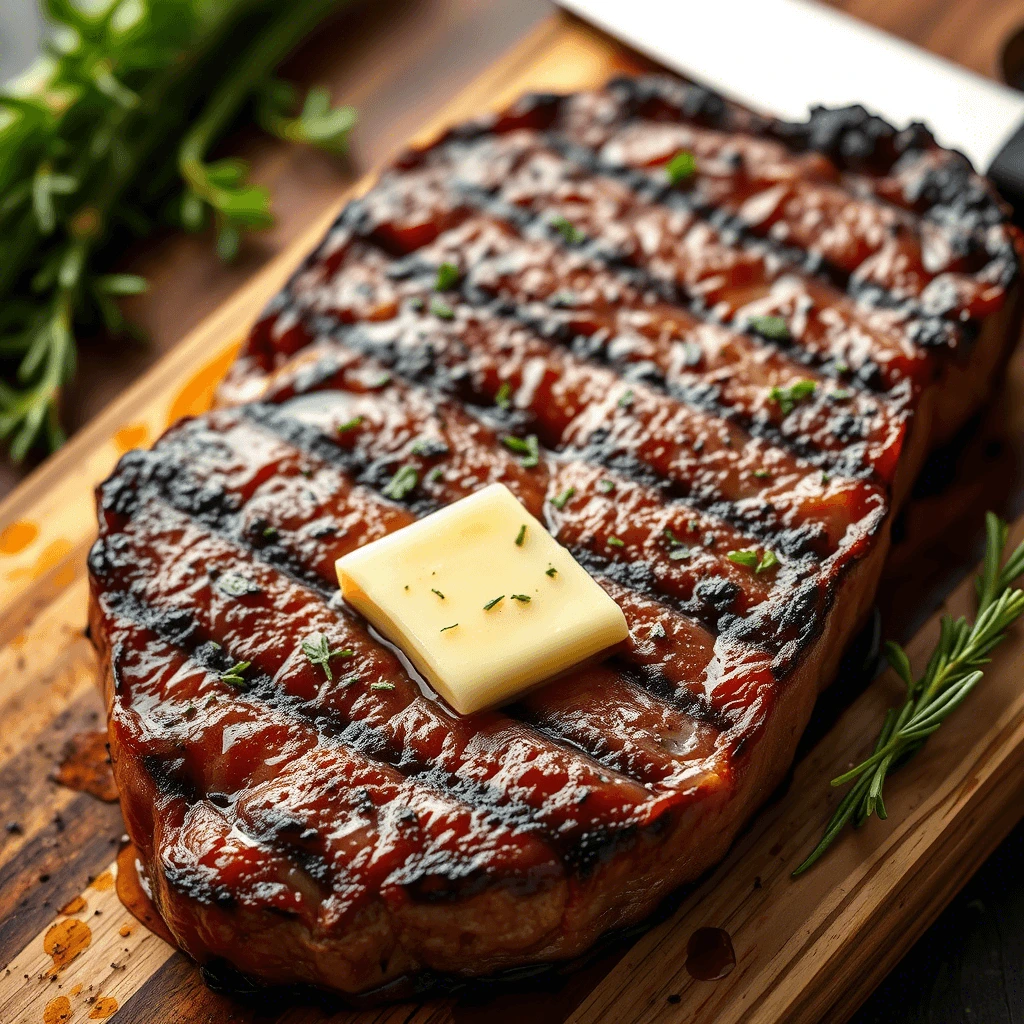
Add Garlic Butter or Fresh Herbs
While a NY strip steak shines on its own with just salt, pepper, and olive oil, adding garlic butter and fresh herbs is a classic finishing touch that can take your steak from great to unforgettable. This simple enhancement adds layers of rich, aromatic flavor without overshadowing the natural taste of the beef.
Garlic Butter: A Steakhouse Secret
- Garlic butter brings creamy richness and a savory, slightly sweet depth that pairs perfectly with the bold character of a NY strip steak.
- It’s often made by mixing softened butter with minced garlic, parsley, and a touch of lemon juice or zest for brightness.
- As it melts over the hot steak, the butter seeps into every crevice, making each bite juicier and more flavorful.
Pro tip: Place a slice of compound garlic butter on top of the steak during the final minute of cooking or immediately after removing it from the heat so it melts beautifully.
Fresh Herbs: Fragrant and Flavorful
- Herbs like rosemary, thyme, and parsley add a fresh, aromatic layer that complements the meat’s richness.
- You can toss a few sprigs into the pan while searing the steak or use them as part of a butter baste along with crushed garlic cloves.
Butter-Basting for Extra Flavor
- To replicate a steakhouse technique, baste your NY strip steak in melted butter during the final minutes of cooking.
- Tilt the skillet slightly and use a spoon to continually drizzle the hot butter (infused with garlic and herbs) over the steak—this adds moisture and boosts flavor without overcooking the interior.
Adding garlic butter or fresh herbs isn’t just a fancy touch—it’s a strategic move that enhances aroma, mouthfeel, and overall enjoyment. With this finishing flourish, your NY strip steak will not only look like a steakhouse special—it’ll taste like one, too.
Check Doneness with a Meat Thermometer
When it comes to cooking the perfect NY strip steak, guessing is never as reliable as knowing. That’s why using a meat thermometer is one of the most important tools in your kitchen if you want to consistently nail your preferred level of doneness. Whether you like your steak rare, medium rare, or well-done, a thermometer ensures precision—and eliminates the risk of overcooking a high-quality cut.
Why Use a Meat Thermometer?
- The difference between a juicy, tender steak and a dry, overdone one often comes down to just a few degrees.
- A thermometer gives you accurate, real-time feedback about the internal temperature of your NY strip steak, so you don’t have to rely on guesswork or cutting into the meat (which releases precious juices).
- It’s especially useful for thicker steaks, where the outside may look done while the inside still needs more time.
Internal Temperature Guide for NY Strip Steak
Here’s a quick reference chart to help you hit your desired doneness:
| Doneness | Temperature (Remove at) | Final Temperature (After Resting) |
|---|---|---|
| Rare | 120–125°F (49–52°C) | 125–130°F (52–54°C) |
| Medium Rare | 125–130°F (52–54°C) | 130–135°F (54–57°C) |
| Medium | 135–140°F (57–60°C) | 140–145°F (60–63°C) |
| Medium Well | 145–150°F (63–66°C) | 150–155°F (66–68°C) |
| Well Done | 155°F+ (68°C+) | 160°F+ (71°C+) |
Tip: Always remove your steak from the heat source when it’s 5°F (2–3°C) below your target temp. The temperature will continue to rise slightly due to carryover cooking while the steak rests.
Where to Insert the Thermometer
- Insert the thermometer into the thickest part of the steak, avoiding any bones or fat pockets.
- Make sure the probe is in the center of the steak for the most accurate reading.
Using a meat thermometer is one of the simplest yet most powerful ways to master steak cooking. With a quick temperature check, you can confidently serve a NY strip steak that’s done exactly how you like it—juicy, flavorful, and cooked to perfection.