If you grew up celebrating birthdays or summer parties, chances are you’ve had a Carvel ice cream cake—that iconic frozen dessert with layers of creamy vanilla and chocolate ice cream, rich fudge, and those irresistible chocolate crunchies. It’s a nostalgic favorite for a reason! But what if you could recreate that same delicious magic at home? This simple and delicious recipe will show you exactly how to make a homemade version of the best Carvel ice cream cake—no baking required. Whether you’re planning a celebration or just craving a cool treat, this DIY dessert is guaranteed to impress.
Why Everyone Loves Carvel Ice Cream Cake
A Classic Dessert for All Occasions
There’s a reason the Carvel ice cream cake has remained a fan favorite for decades—it’s the kind of dessert that brings instant joy to any celebration. Whether you’re hosting a birthday party, a backyard BBQ, a graduation gathering, or simply treating your family on a hot summer day, this cake fits the mood perfectly. Its cool, creamy layers and crunchy chocolate center make it a guaranteed crowd-pleaser for both kids and adults.
One of the things that makes it so special is its versatility. You don’t need to wait for a major holiday to enjoy it. Serve it at casual get-togethers, surprise someone with it on a weeknight, or keep one in the freezer just in case you need a last-minute dessert that feels festive and indulgent. It’s the perfect mix of nostalgia and delicious simplicity, which is why so many people continue to choose Carvel ice cream cake year after year.
Plus, when you make it yourself, you can customize every layer—switch up the ice cream flavors, try new toppings, or add a personal message in frosting. It’s more than just a dessert; it’s a memory-maker that turns everyday moments into something sweet and memorable.
What Makes Carvel Ice Cream Cake Unique
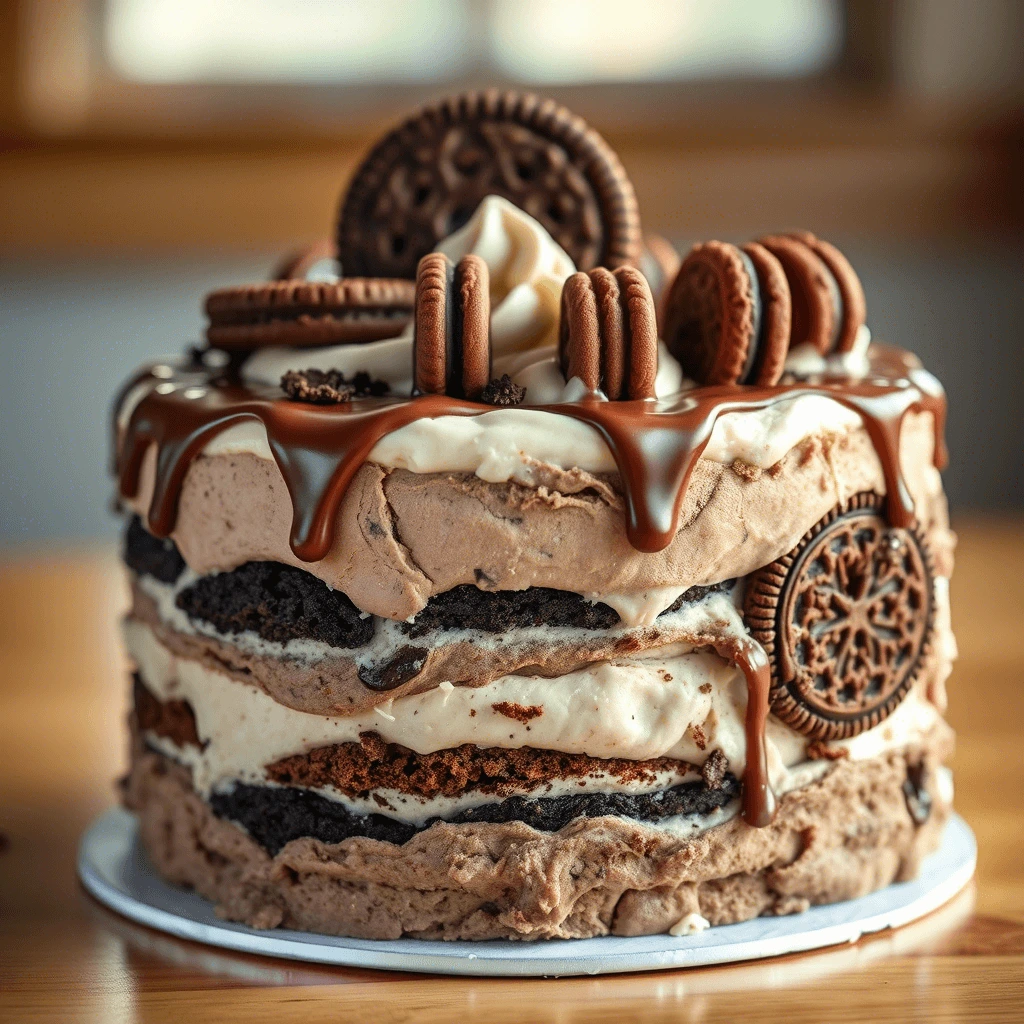
What sets a Carvel ice cream cake apart from other frozen desserts isn’t just the combination of ice cream and frosting—it’s the signature layers and textures that create a one-of-a-kind experience in every bite. At the heart of this iconic treat is the perfect balance of vanilla and chocolate ice cream, layered with rich chocolate fudge and the unmistakable chocolate crunchies that Carvel fans know and love.
The chocolate crunchies are arguably the most iconic element. They’re made from a special blend of chocolate cookie pieces that stay crisp even between layers of soft, creamy ice cream. When combined with the gooey fudge layer, they add the perfect contrast of texture—crunchy, smooth, and sweet all at once. It’s this layered effect that makes every bite exciting and satisfying.
Another thing that makes Carvel’s version stand out is the whipped topping, which replaces traditional frosting. It’s light, fluffy, and not overly sweet, making it the perfect complement to the richness of the fudge and the ice cream. The simplicity of the ingredients, combined with thoughtful layering and texture, has made Carvel ice cream cake a go-to dessert for generations.
Whether store-bought or homemade, this cake delivers a nostalgic experience that few other frozen desserts can match. It’s not just a cake—it’s a classic that brings joy, smiles, and a bit of childhood magic to any celebration.
Store-Bought vs. Homemade Carvel Ice Cream Cakes
When it comes to celebrating with a Carvel ice cream cake, you might be wondering whether to grab one from the store or try your hand at making it from scratch. The truth is—both options have their perks, but there are some clear differences that may help you decide which route to take.
Store-bought Carvel ice cream cakes are incredibly convenient. You get the iconic layers—vanilla and chocolate ice cream, fudge, and chocolate crunchies—all perfectly assembled and ready to go. They’re great for last-minute celebrations or when you’re short on time. Plus, the nostalgic value of the original Carvel branding and the consistency of its flavors make it a comforting choice for those who grew up with it.
However, making a homemade Carvel-style ice cream cake opens the door to endless customization. You can recreate the same beloved structure—ice cream layers, fudge, and crunchies—while tailoring the ingredients to your taste or dietary preferences. Want to swap the chocolate ice cream for cookies and cream? Prefer a gluten-free crunch layer? Or want to create a gourmet version with caramel drizzle or fruit? The homemade approach gives you full control.
There’s also a certain satisfaction in making it yourself. It’s a fun, creative process—ideal for involving kids or adding a personal touch to a birthday celebration. And let’s not forget, homemade versions are often fresher, with no preservatives and the ability to use premium-quality ice cream and toppings.
In the end, whether you choose a ready-made Carvel ice cream cake from the freezer aisle or whip up your own version at home, you’re in for a delicious treat. But if you’re up for it, trying a DIY Carvel ice cream cake can be just as memorable—and even more delicious.
How to Make a Carvel Ice Cream Cake at Home
Ingredients You’ll Need
Creating your own Carvel ice cream cake at home is surprisingly simple—and with the right ingredients, you can capture that nostalgic flavor and texture everyone loves. The key is to mimic the signature layers: smooth ice cream, rich fudge, crunchy cookie bits, and a light whipped topping. Here’s what you’ll need to bring this frozen dessert to life:
1. Vanilla and Chocolate Ice Cream
These two flavors are the heart of a traditional Carvel ice cream cake. Use quality brands for the best taste and texture, and let them soften slightly before layering. If you’re feeling creative, you can swap in other flavors like cookies and cream, mint chocolate chip, or even caramel swirl—but for the classic version, vanilla and chocolate are a must.
2. Chocolate Crunchies
This is what makes the Carvel experience so iconic. The crunchies layer, usually placed between the two ice cream layers, is made with crushed chocolate cookies (like chocolate wafers or Oreo crumbs) mixed with a little melted butter or chocolate shell topping to help them stay crisp and clustered.
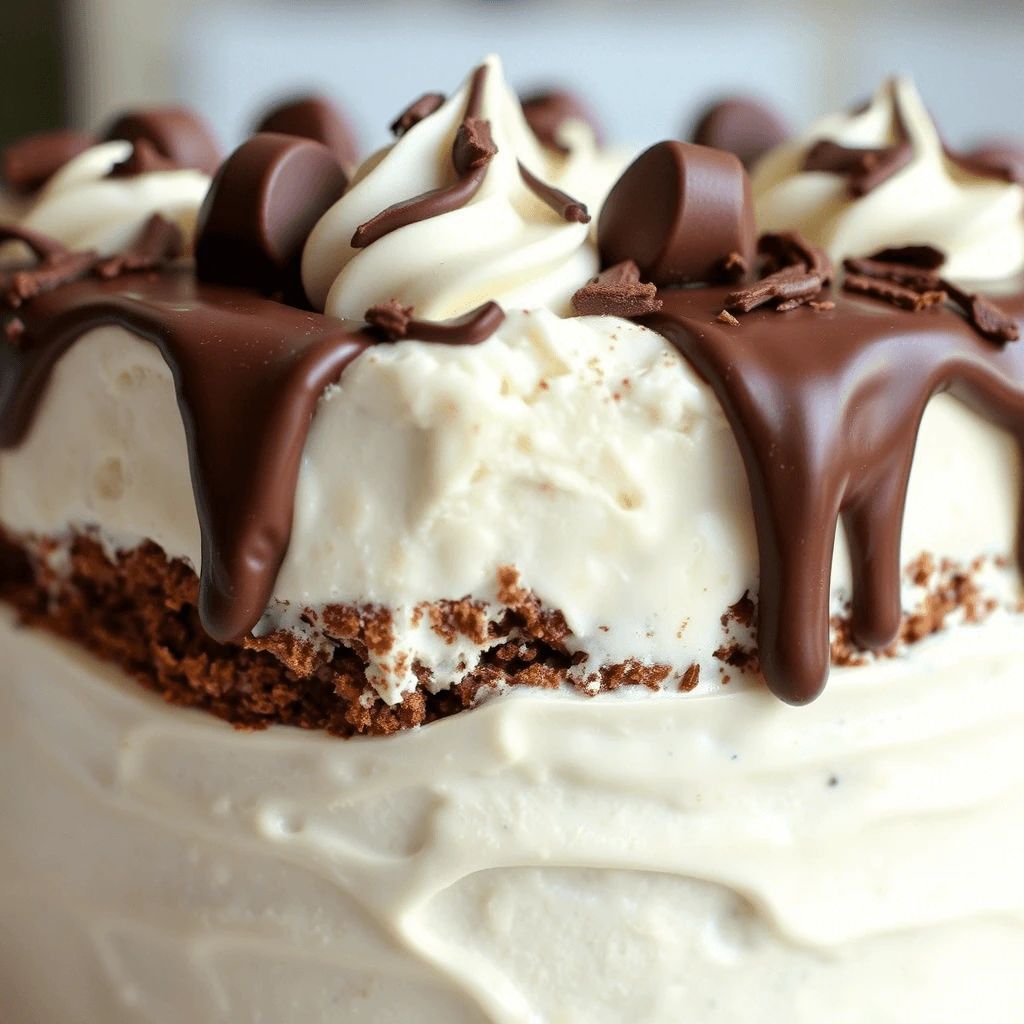
3. Fudge Sauce
Rich and gooey, the fudge layer adds depth and decadence to the cake. You can use store-bought hot fudge sauce or make a homemade version using chocolate chips, cream, and a touch of butter. Spread it generously over the crunchies to hold everything together and intensify the flavor.
4. Whipped Topping or Frosting
Traditional Carvel cakes are topped with a light whipped frosting, not a heavy buttercream. You can use whipped topping like Cool Whip for convenience, or make your own stabilized whipped cream with heavy cream and powdered sugar. This gives your cake that fluffy, cloud-like finish that balances out the richer layers underneath.
5. Optional Add-ons
Want to give your cake a personal twist? Consider adding rainbow sprinkles, chocolate shavings, a caramel drizzle, or a piped message on top. You can also play around with different crust bases or add a layer of cookie crumbs at the bottom for extra texture.
With these ingredients in hand, you’re ready to create a homemade Carvel-style ice cream cake that’s perfect for birthdays, holidays, or just a delicious way to cool off on a warm day.
Step-by-Step Assembly Instructions
Now that you’ve gathered all the delicious ingredients, it’s time to put together your homemade Carvel ice cream cake. Don’t worry—it’s easier than it looks, and the process is actually a lot of fun! Follow these step-by-step instructions to layer everything perfectly and get that classic Carvel look and taste.
1. Prepare Your Pan and Base Layer
Start by choosing a round or rectangular springform pan (or line a regular cake pan with plastic wrap for easy removal). Let your chocolate ice cream soften for about 10–15 minutes at room temperature—just enough so it’s easy to spread but not melted.
Scoop the chocolate ice cream into the bottom of the pan and spread it evenly with a spatula. Press it down gently to create a smooth, firm layer. Place the pan in the freezer for 20–30 minutes to let the first layer firm up before adding the next.
2. Add the Crunchies and Fudge Layer
Once the chocolate ice cream is set, it’s time to add the famous Carvel crunch layer. Sprinkle a generous amount of your chocolate cookie crunchies evenly over the ice cream. Press them down lightly so they stick.
Next, drizzle or spread a thick layer of fudge sauce right over the crunchies. This creates that rich, gooey middle that Carvel cakes are known for. Return the pan to the freezer for another 15–20 minutes so the fudge sets.
3. Add the Vanilla Ice Cream Layer
Just like before, let the vanilla ice cream soften slightly, then spoon it over the chilled fudge layer. Spread it evenly and smooth out the top. Make sure it reaches all corners of the pan so your cake has clean, even layers.
Cover the pan with plastic wrap or foil and freeze for at least 4–6 hours, or overnight if possible, so the cake can firm up completely.
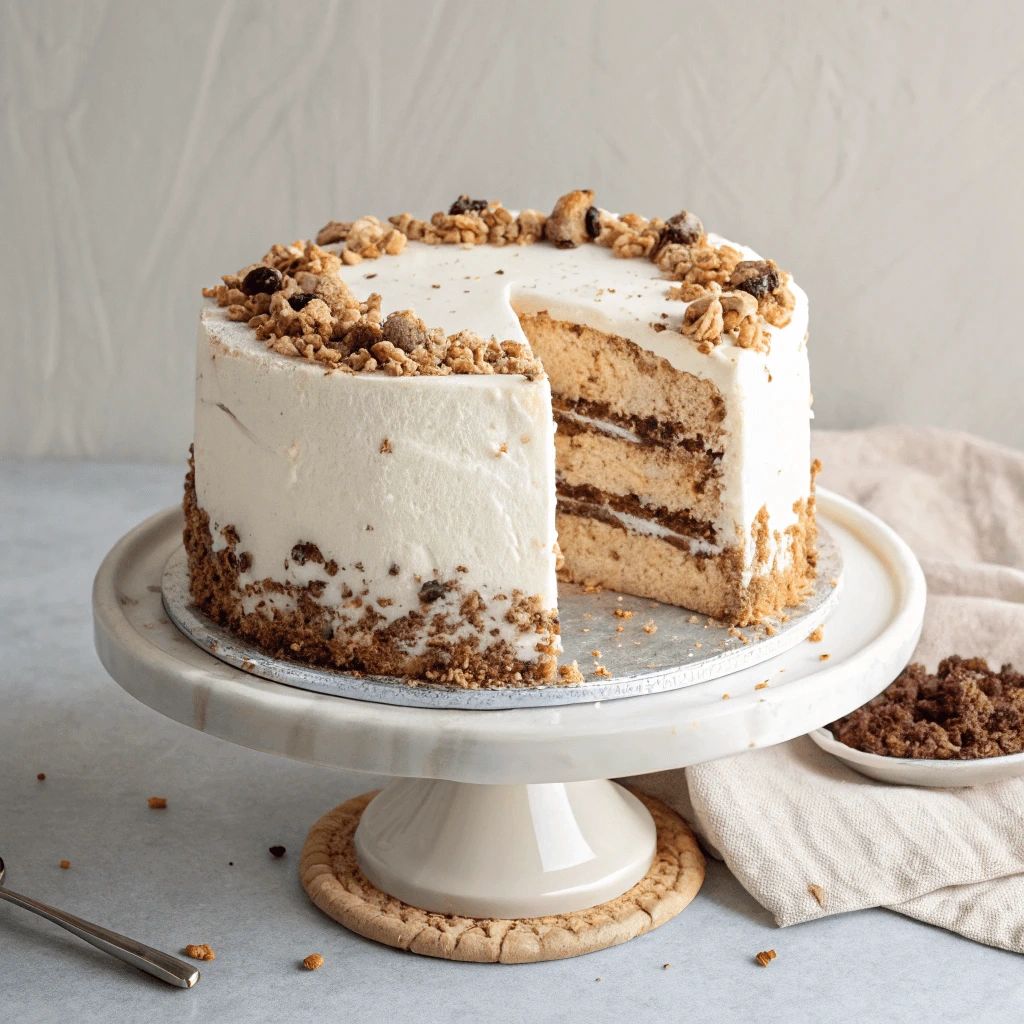
4. Frost and Decorate
Once the cake is fully frozen and solid, remove it from the pan. If you used a springform pan, just release the sides. If you used a lined pan, lift the cake out gently using the edges of the plastic wrap.
Frost the cake with whipped topping or homemade whipped cream, spreading it all around the top and sides. You can decorate the cake with sprinkles, cookie crumbs, chocolate shavings, or even write a birthday message using colored frosting.
5. Slice and Serve
For clean, easy slices, dip a sharp knife into hot water before each cut. Serve immediately and enjoy your homemade version of the classic Carvel ice cream cake—cool, creamy, crunchy, and absolutely unforgettable!
Tips for the Perfect Texture and Taste
Making a Carvel ice cream cake at home is simple—but getting that perfect texture and nostalgic taste takes just a little extra care. With these pro tips, you’ll be able to replicate the soft, creamy layers, rich chocolatey crunch, and whipped frosting that make this frozen treat so special.
1. Let the Ice Cream Soften—But Not Melt
The key to smooth layers is softened (not melted) ice cream. Let each flavor sit at room temperature for about 10–15 minutes before layering. This makes it easier to spread evenly without turning soupy. If it’s too soft, it may not refreeze properly, and you’ll lose that firm, classic cake shape.
2. Freeze Between Layers for Better Structure
Don’t rush the layering process. Freezing each layer for 15–30 minutes before adding the next helps create clear, clean layers that won’t mix or slide. It also prevents the cookie crunchies and fudge from sinking or softening too much.
If you’re in a hurry, pop the pan in the freezer for 5–10 minutes between steps, but for best results, give each layer time to fully set.
3. Use Quality Ice Cream and Fudge
The better the ingredients, the better the flavor. Use creamy, full-fat vanilla and chocolate ice cream for that rich, smooth texture. Avoid light or low-fat versions, which can turn icy when frozen again.
For the fudge layer, choose a thick, high-quality hot fudge sauce, or make your own with chocolate chips, cream, and butter. A rich fudge layer ties the ice cream and crunch together beautifully.
4. Create the Signature Crunch Layer
The iconic Carvel crunchies make or break the cake. Mix crushed chocolate cookies (like Oreos without filling or chocolate wafers) with a bit of melted butter or chocolate shell topping. This combo creates clusters that stay crisp—even after freezing.
Pro tip: Spread the crunch evenly and press lightly into the ice cream to prevent it from scattering when slicing the cake later.
5. Whipped Topping for a Light Finish
Skip heavy frostings like buttercream—Carvel cakes are known for their light, whipped topping. Use a stabilized whipped cream (with a little powdered sugar and cornstarch), or Cool Whip if you want a no-fuss shortcut. Frost once the cake is fully frozen for best results.
6. Slice Like a Pro
Want those clean, bakery-style slices? Dip a large knife in hot water before each cut. Wipe the blade between slices for a picture-perfect presentation that shows off those creamy, crunchy layers.
With just a bit of attention to these details, your homemade Carvel ice cream cake will not only look stunning, but it’ll taste just like the real thing—maybe even better!
Serving, Storing, and Customizing Your Cake
Best Ways to Serve and Slice your Carvel Ice Cream Cake
Serving your Carvel ice cream cake the right way makes all the difference in taste, texture, and presentation. Whether you’re hosting a birthday bash, summer get-together, or just indulging in a nostalgic treat, following a few simple tips will ensure each slice looks beautiful and tastes as amazing as it should.
1. Let the Cake Sit Before Slicing
After removing your homemade Carvel ice cream cake from the freezer, let it sit at room temperature for about 5 to 10 minutes. This short rest helps soften the outer layer slightly, making it easier to slice without cracking or crumbling the cake. You don’t want it to melt—but giving it just enough time to soften ensures the knife glides through the layers smoothly.
2. Use a Hot Knife for Clean Slices
For perfectly neat slices, run a sharp, non-serrated knife under hot water, then dry it with a towel before cutting. Repeat this process between each slice. The warmth helps melt through the frozen layers—especially the fudge and cookie crunch—resulting in clean, bakery-style cuts that showcase the beautiful textures of chocolate, vanilla, and crunchies.
3. Serve on Chilled Plates
If you’re preparing ahead for a party or warm weather event, place dessert plates in the freezer for a few minutes before serving. Chilled plates help keep your slices of Carvel ice cream cake cold for longer, preventing premature melting while guests enjoy their dessert.
4. Add Extra Toppings for a Festive Touch
Elevate your presentation by garnishing each slice with a dollop of whipped cream, chocolate syrup drizzle, or a sprinkle of crushed cookies or sprinkles. This not only makes the dessert look more festive but enhances the flavor with extra sweetness and crunch.
5. Serve Immediately (or Refreeze Quickly)
Once sliced, serve immediately for the best texture. If you have leftovers, place the remaining cake back in the freezer as soon as possible. Wrap it tightly with plastic wrap or store it in an airtight container to prevent freezer burn and keep it fresh for later indulgence.
With just a little planning and the right tools, your Carvel ice cream cake will look as good as it tastes—whether you’re serving it at a big celebration or simply enjoying a slice on a quiet evening.
Storing Leftovers (If You Have Any!)
Let’s be honest—Carvel ice cream cake is so delicious that leftovers might be rare. But if you’re lucky enough to have a few extra slices, proper storage is key to preserving that signature texture and taste for your next sweet craving.
1. Wrap Tightly to Prevent Freezer Burn
After slicing, tightly wrap the remaining cake with plastic wrap, making sure to cover all exposed areas, especially any sliced edges. For extra protection, place the wrapped cake in an airtight container or wrap it again in aluminum foil. This double layer helps lock in freshness and keeps out freezer odors or ice crystals that can ruin the cake’s creamy consistency.
2. Use a Freezer-Safe Container
If your cake came in a store-bought Carvel box, it’s usually designed to be freezer-safe. But for homemade versions, transfer any leftovers to a flat, freezer-safe container that allows for easy stacking and protects delicate decorations or toppings. Avoid containers that leave the cake exposed to air, as that can lead to freezer burn and sogginess over time.
3. Store at the Coldest Part of the Freezer
Place the cake in the back of your freezer, where the temperature is most stable and coldest. This helps preserve the ice cream texture and keeps layers like the fudge and chocolate crunchies from becoming mushy or separating.
4. How Long Does It Last?
When properly stored, your Carvel ice cream cake will stay fresh in the freezer for up to 7 days. After that, the texture may begin to change, especially in the whipped topping and cookie crunch layers. For the best flavor and mouthfeel, try to enjoy leftovers within the first 3–5 days.
5. Re-Serving Leftovers
To re-serve, remove the cake from the freezer and let it sit at room temperature for 5–10 minutes before slicing again. You can dress up leftover slices with a fresh drizzle of chocolate syrup, extra whipped cream, or sprinkles to give them a “freshly made” feel all over again.
Whether it’s the last slice or half a cake, properly storing your Carvel ice cream cake ensures every bite stays just as dreamy as the first. Because honestly, a dessert this good should never go to waste!
Fun Variations You Can Try
While the classic Carvel ice cream cake is hard to beat, one of the best things about making it at home is the ability to get creative! Whether you’re catering to different flavor preferences, celebrating a themed occasion, or just having fun in the kitchen, there are so many ways to put your own twist on this beloved frozen treat.
1. Try Different Ice Cream Flavors
Swap out the traditional vanilla and chocolate combo for unique or seasonal flavors! Some delicious ideas include:
- Cookies and Cream + Mint Chocolate Chip for a cool, refreshing vibe
- Strawberry + Vanilla Bean for a fruity, Neapolitan-style treat
- Peanut Butter Cup + Fudge Swirl for a rich, indulgent twist
Just make sure the ice creams pair well and have similar textures so they freeze and slice evenly.
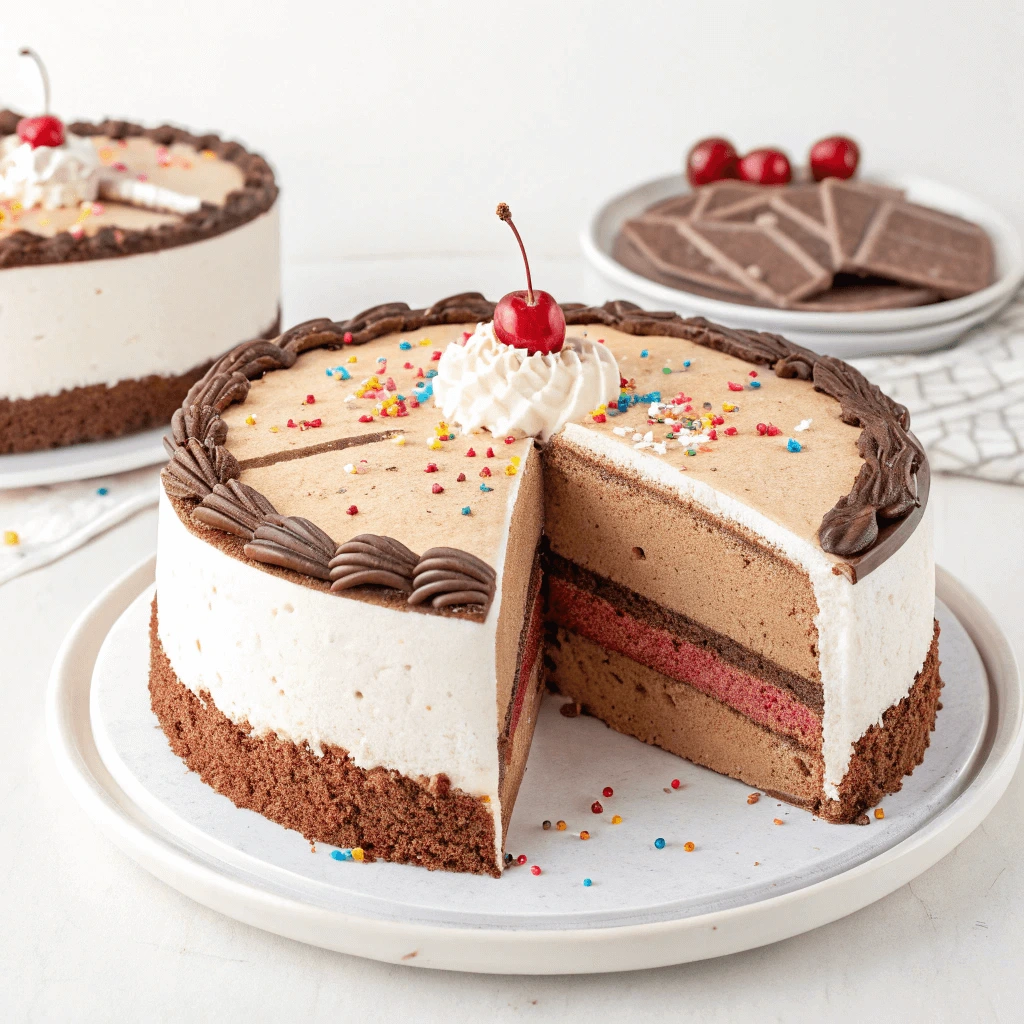
2. Make It a Birthday Cake
Turn your Carvel ice cream cake into a birthday showstopper by adding fun layers like:
- Rainbow sprinkles mixed into the whipped topping
- A layer of crushed birthday cake cookies or funfetti crunchies
- Piped borders and a personalized birthday message in colorful frosting
You can even add candles or a sparkler on top for a festive touch!
3. Use Different Crunch Layers
While traditional chocolate cookie crunchies are classic, you can mix it up with:
- Crushed Oreos with filling for extra creaminess
- Toffee bits or peanut brittle for a caramelized crunch
- Crushed pretzels for a salty-sweet combo
You can also try combining different textures by mixing two types of crunchies for a layered surprise in every bite.
4. Create Mini Ice Cream Cakes
Instead of one large cake, make individual-sized ice cream cakes using ramekins, silicone molds, or a muffin tin. These are perfect for parties, kids, or portion control—and they look adorable when served!
Each mini cake can have its own flavor combo, which is great for guests with different tastes.
5. Make It a Holiday Treat
Customize your ice cream cake for special holidays:
- Valentine’s Day: Use strawberry and chocolate ice cream with red sprinkles
- Halloween: Add orange and black cookie crunchies, candy pieces, and chocolate drizzle
- Christmas: Use peppermint ice cream, crushed candy canes, and green whipped topping
These fun variations make your cake feel special and festive for any time of year.
With these creative ideas, you can transform your homemade Carvel ice cream cake into a dessert that’s not only delicious but totally unique. Whether you’re sticking with the classic or exploring bold flavor combos, there’s no wrong way to enjoy this frozen favorite!