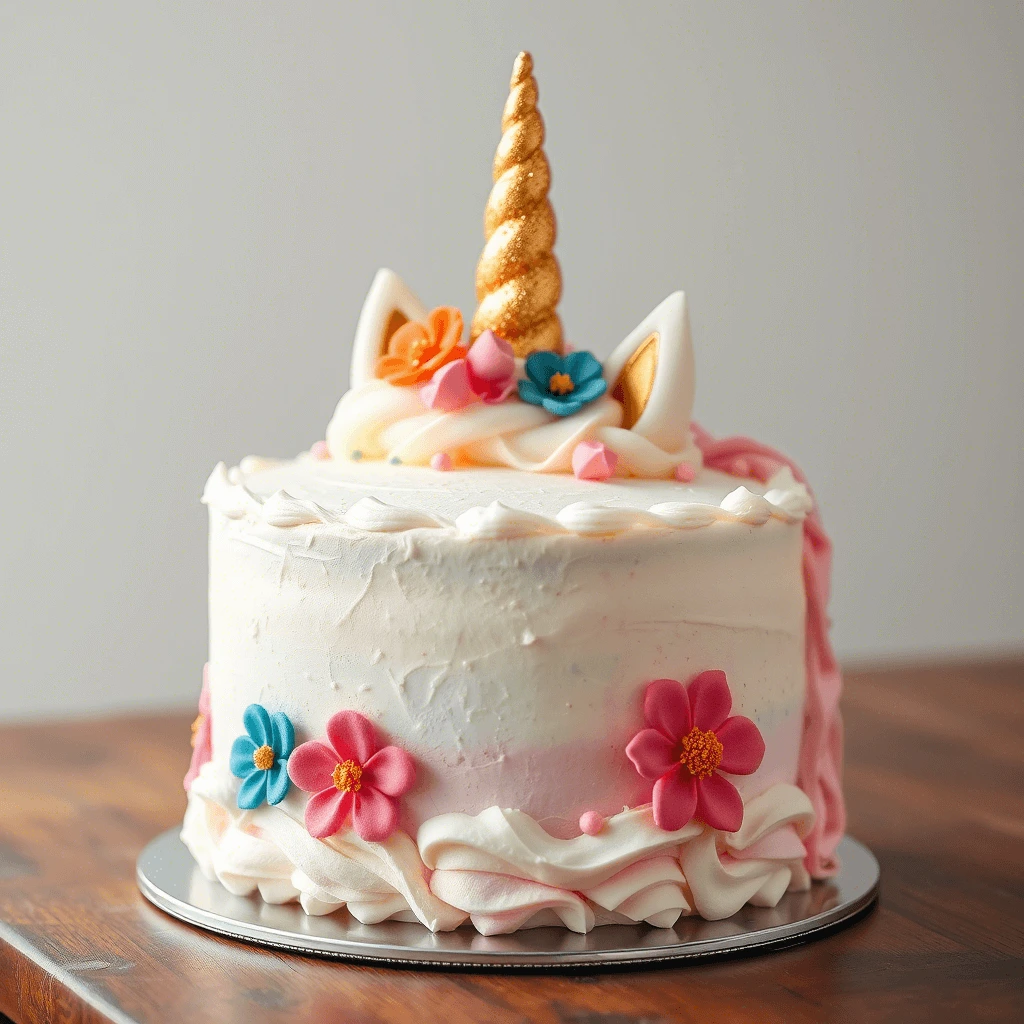
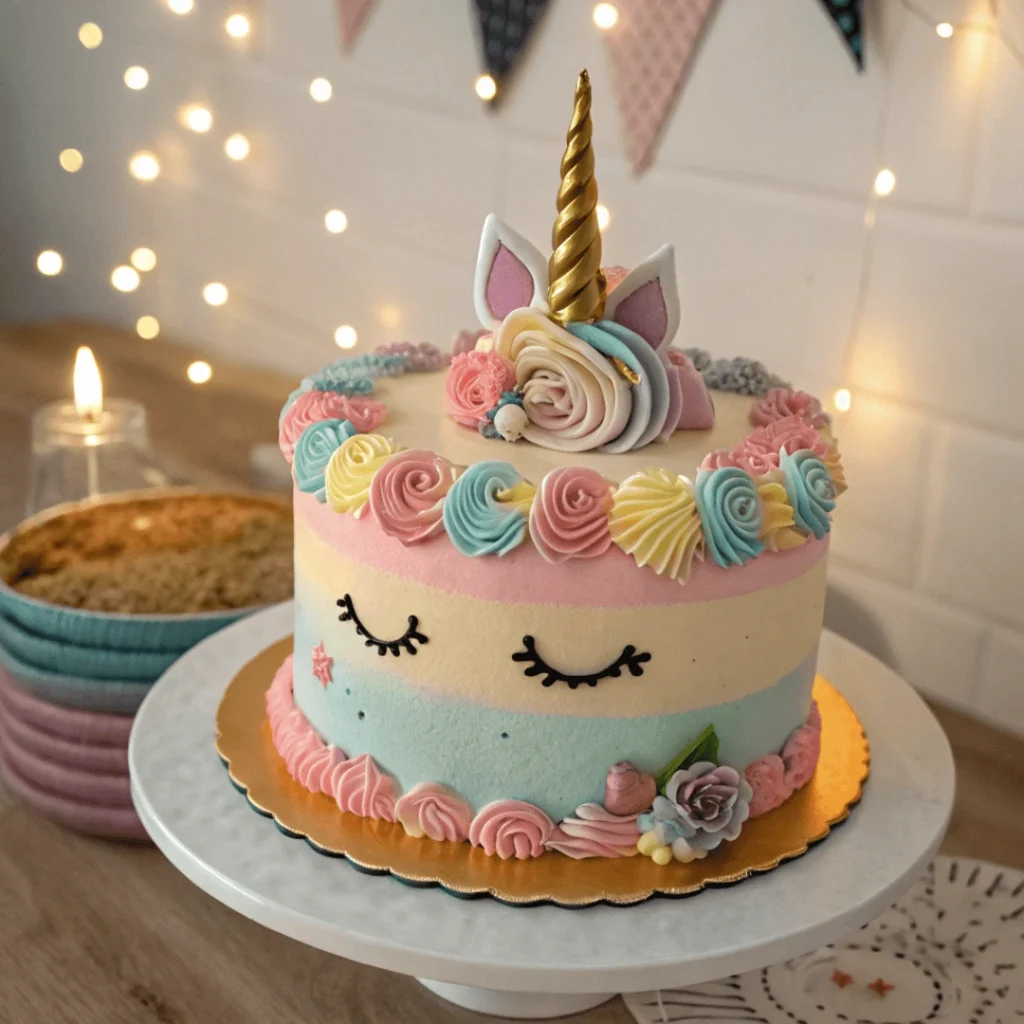
Unicorn cakes have taken the baking world by storm, becoming a must-have centerpiece for birthdays, baby showers, and special celebrations. With their whimsical designs, pastel colors, and signature golden horns, these magical unicorn cakes bring joy to both kids and adults alike. But what if you could create your own unicorn cake right at home?
In this step-by-step guide, we’ll show you how to make a stunning unicorn cake from scratch. Whether you’re a beginner or an experienced baker, you’ll learn everything from baking the perfect cake layers to decorating your unicorn cake with buttercream, fondant, and edible glitter. We’ll also share pro tips to ensure your unicorn cake looks just as magical as the ones from professional bakeries.
Get ready to bring some sparkle to your kitchen—let’s create a show-stopping unicorn cake that will leave everyone amazed!
Ingredients You’ll Need for a Perfect Unicorn Cake
Cake Base Ingredients: Choosing the Perfect Foundation for Your Unicorn Cake
The foundation of any great cake starts with high-quality ingredients. Since a unicorn cake is not just about looks but also taste, choosing the right base will ensure a moist, flavorful, and sturdy cake that can hold up to frosting and decorations. Here’s everything you need to know about selecting the perfect cake base ingredients.
1. Choosing the Right Cake Flavor
While vanilla is the most common choice for unicorn cakes because of its light color (perfect for pastel layers), you can experiment with different flavors to match your preference. Here are some popular options:
- Classic Vanilla Cake – Light, fluffy, and pairs well with any frosting.
- Chocolate Cake – A rich and indulgent option for chocolate lovers.
- Funfetti Cake – Adds a festive touch with colorful sprinkles mixed into the batter.
- Rainbow Cake – Layers of different colored cake batter create a stunning surprise when sliced.
- Strawberry or Raspberry Cake – A fruity, slightly tangy flavor that pairs well with buttercream.
2. Essential Cake Base Ingredients
To make a soft and moist unicorn cake, you’ll need these key ingredients:
Flour: Use all-purpose flour for a firmer cake or cake flour for a softer texture. Cake flour creates a lighter crumb, which is ideal for multi-layer cakes.
Sugar: Granulated sugar provides sweetness, while brown sugar adds moisture and a slight caramelized flavor.
Butter or Oil:
- Butter-based cakes offer a rich flavor and firmer texture.
- Oil-based cakes (like those made with vegetable or canola oil) tend to be more moist and stay fresh longer.
Eggs: Help bind the ingredients and add structure to the cake. Use room-temperature eggs for better mixing and texture.
Milk or Buttermilk: Adds moisture and tenderness to the cake. Buttermilk gives a slight tangy flavor and helps create a softer crumb.
Baking Powder & Baking Soda: Essential for leavening, making the cake rise and stay fluffy.
Vanilla Extract: Enhances the flavor and aroma of the cake, making it taste bakery-quality.
3. Adding Color to Your Cake Layers
One of the highlights of a unicorn cake is its pastel rainbow layers. You can achieve this effect by:
- Dividing your cake batter into separate bowls.
- Adding gel food coloring (not liquid, as it can alter the consistency).
- Using soft, pastel shades like pink, blue, purple, and yellow for a dreamy unicorn look.
4. Alternative Cake Bases for Dietary Preferences
Want to make your unicorn cake gluten-free or vegan? Here are some great substitutes:
- Gluten-Free Option: Use a high-quality gluten-free flour blend.
- Vegan Option: Replace eggs with applesauce, mashed bananas, or flaxseed eggs, and use dairy-free milk and butter alternatives.
By carefully selecting your ingredients and ensuring your cake base is both delicious and structurally sound, you’ll set yourself up for success when it comes time to decorate your unicorn cake. Up next, we’ll guide you through baking and assembling your cake layers for the perfect unicorn masterpiece!
Buttercream Frosting: The Perfect Topping for Your Unicorn Cake
A unicorn cake wouldn’t be complete without a luscious, smooth, and beautifully colored buttercream frosting. Not only does buttercream add flavor and texture, but it also serves as the base for decorations, helping bring your unicorn cake to life. Whether you want a simple pastel finish or a vibrant rainbow mane, choosing and preparing the right buttercream is essential.
1. Choosing the Right Type of Buttercream
There are several types of buttercream, but for a unicorn cake, it’s important to choose one that’s both stable and easy to pipe. Here are the best options:
American Buttercream (Easiest & Most Popular)
Pros: Sweet, easy to make, holds color well, perfect for piping decorations
Cons: Can be too sweet and slightly grainy
- Made with butter, powdered sugar, vanilla extract, and milk or heavy cream
- Great for smooth frosting and unicorn mane piping
Swiss Meringue Buttercream (Smooth & Less Sweet)
Pros: Silky texture, less sweet than American buttercream, stable for decorations
Cons: Requires more effort and precision
- Made by whisking egg whites and sugar over a double boiler, then whipping in butter
- Holds up well for fondant decorations and intricate piping
Italian Meringue Buttercream (Stable & Professional-Grade)
Pros: Very stable, holds its shape, not overly sweet
Cons: More complex to make, requires a candy thermometer
- Made by cooking sugar syrup and whipping it into egg whites before adding butter
- Ideal for warm climates or when extra stability is needed
Vegan Buttercream (Dairy-Free Alternative)
Pros: Great for those with dietary restrictions, easy to make
Cons: Can be slightly softer, requires adjustments for piping
- Uses vegan butter or shortening, powdered sugar, and plant-based milk
- Works well for frosting, but may need chilling for intricate piping
2. Essential Ingredients for a Perfect Buttercream
To achieve smooth, creamy, and flavorful buttercream, you’ll need:
- Unsalted Butter: Softened at room temperature for easy mixing and a creamy texture.
- Powdered Sugar: Also known as icing sugar; sifted to prevent lumps.
- Milk or Heavy Cream: Adjusts the consistency—use more for a softer texture, less for a firmer one.
- Vanilla Extract: Enhances flavor, but you can also use almond, lemon, or other extracts.
- Food Coloring: Gel-based food colors work best as they don’t alter the consistency.
- Salt (Optional): Balances the sweetness of the buttercream.
3. How to Make the Best Buttercream for Your Unicorn Cake
Follow this simple step-by-step recipe to make the perfect buttercream:
- Whip the Butter
- Beat softened unsalted butter in a stand mixer for 3-5 minutes until pale and fluffy.
- This step helps create a light and airy texture.
- Add Powdered Sugar
- Gradually add powdered sugar (1 cup at a time), mixing at low speed to avoid mess.
- Increase to medium-high speed once incorporated.
- Adjust Consistency
- Add milk or heavy cream (1 tablespoon at a time) until you reach the desired consistency.
- For piping decorations, keep the buttercream slightly firm.
- For frosting the cake, a softer, spreadable consistency is best.
- Color Your Buttercream
- Divide the buttercream into separate bowls for different pastel unicorn colors (pink, purple, blue, yellow, etc.).
- Use gel food coloring for vibrant shades without making the frosting runny.
4. Pro Tips for the Perfect Buttercream Finish
- Use Room Temperature Butter – If your butter is too cold, it won’t mix properly, leading to a grainy texture.
- Whip It Well – The longer you whip, the fluffier and smoother the buttercream will be.
- Chill Before Piping – If your buttercream is too soft, refrigerate for 10-15 minutes before piping decorations.
- Smooth Finish Hack – After frosting the cake, run a spatula under warm water, then smooth out the buttercream for a flawless finish.
- Avoid Overmixing – Over-whipped buttercream can become too airy, causing bubbles when spreading.
5. Using Buttercream for Unicorn Cake Decorations
- Once your buttercream is ready, you can use it for:
- Crumb Coating & Frosting the Cake – A thin layer of buttercream to lock in crumbs before final frosting.
- Creating a Pastel Ombre Effect – Blending different colors for a magical unicorn look.
- Piping the Unicorn Mane – Using star and rosette piping tips to create a fluffy, colorful mane.
- Decorative Swirls & Rosettes – Adding texture with different piping techniques.
Fondant & Decorations: Bringing Your Unicorn Cake to Life
The true magic of a unicorn cake lies in its whimsical decorations—from the elegant fondant unicorn horn and ears to the colorful sprinkles and edible glitter that make it sparkle. Mastering the art of fondant shaping and decorating techniques will help turn your cake into a stunning centerpiece for any celebration. In this section, we’ll explore how to work with fondant, create beautiful decorations, and add finishing touches that will make your unicorn cake truly enchanting.
1. What is Fondant, and Why Use It?
Fondant is a smooth, pliable sugar paste used for decorating cakes. It allows bakers to mold intricate shapes, create a flawless finish, and add creative details to cakes.
Why Use Fondant for a Unicorn Cake?
- Smooth Finish: Fondant creates a sleek, professional look that buttercream alone can’t achieve.
- Custom Shapes: Perfect for making a unicorn horn, ears, stars, and other decorations.
- Durable: Holds its shape well, making it ideal for intricate details.
- Customizable Colors: Can be dyed into pastel or bold shades to match your theme.
There are two types of fondant you can use:
Homemade Fondant – Made using marshmallows and powdered sugar, offering a softer and more natural taste.
Store-Bought Fondant – Convenient and easy to work with, available in various colors.
2. How to Make a Fondant Unicorn Horn & Ears
The unicorn horn and ears are the signature elements of your cake. Here’s how to create them:
Step 1: Making the Fondant Unicorn Horn
- Roll out a long, thick piece of fondant into a rope shape.
- Twist it into a spiral to create the classic unicorn horn look.
- Insert a wooden skewer or toothpick through the center for stability.
- Paint with edible gold luster dust or gold food coloring for a magical effect.
- Let it dry and harden for at least 2-4 hours before placing it on the cake.
Step 2: Crafting the Unicorn Ears
- Roll out white fondant and cut out two teardrop-shaped pieces for the ears.
- Roll out pink fondant (or another pastel shade) and cut out smaller teardrop shapes for the inner ears.
- Attach the pink pieces onto the white ears using a small amount of water or edible glue.
- Let them dry to hold their shape before positioning them on the cake.
3. Adding Decorative Elements to Your Unicorn Cake
Now that the horn and ears are ready, it’s time to enhance the look with additional decorations.
Piping a Colorful Unicorn Mane
- One of the most eye-catching features of a unicorn cake is its flowing, multi-colored mane. You can achieve this effect by:
- Using pastel buttercream in shades like pink, blue, purple, and yellow.
- Using different piping tips (star, rosette, and drop flower tips) for a varied texture.
- Swirling colors together in a piping bag to create a blended, ombré effect.
Edible Glitter, Pearls & Sprinkles
- To make your cake magical and sparkly, consider adding these fun elements:
- Edible glitter or shimmer dust – Dust lightly over the cake for a fairy-tale glow.
- Gold or silver edible pearls – Scatter on the buttercream mane for an elegant touch.
- Star or heart-shaped sprinkles – Adds extra charm and fun to your design.
Additional Fondant Decorations
You can also make extra fondant elements to enhance the theme:
- Little fondant stars or clouds placed around the cake.
- Mini fondant flowers for a delicate, garden-like look.
- A fondant rainbow to go behind the unicorn horn.
4. Pro Tips for Working with Fondant
- Keep Fondant Soft & Pliable – If fondant becomes too dry or cracks, knead it with a small amount of shortening or glycerin.
- Use Cornstarch or Powdered Sugar – Prevent fondant from sticking to your work surface while rolling it out.
- Let Decorations Dry Before Placing on the Cake – This ensures they hold their shape and don’t sag.
- Store Fondant Properly – Wrap leftover fondant in plastic wrap and store in an airtight container to prevent drying out.
- Use Edible Glue or Water to Attach Decorations – Lightly dampen fondant pieces to stick them together seamlessly.
Step-by-Step Recipe for a Delicious Unicorn Cake
Preparing the Cake Batter: The Foundation of Your Unicorn Cake
The first step in creating a stunning unicorn cake is preparing a delicious, moist, and fluffy cake batter. Since a unicorn cake is all about vibrant colors and dreamy layers, the batter should be smooth, well-mixed, and easy to divide for coloring. In this section, we’ll guide you through choosing the best ingredients, mixing techniques, and tips for achieving the perfect batter consistency.
1. Choosing the Right Cake Flavor for Your Unicorn Cake
Before you start mixing, consider which cake flavor best suits your theme and occasion. Here are some popular flavor options:
- Classic Vanilla Cake – A light and fluffy choice that pairs well with any frosting.
- Chocolate Cake – A rich and indulgent alternative that can be colored lightly with white chocolate.
- Funfetti Cake – A festive option with rainbow sprinkles mixed into the batter.
- Strawberry or Raspberry Cake – A fruity twist for a refreshing, slightly tangy flavor.
- Rainbow Layer Cake – Different colored layers for a surprise inside when sliced.
For this guide, we’ll focus on a classic vanilla cake base, which provides a neutral backdrop for the colorful unicorn design.
2. Essential Ingredients for the Perfect Cake Batter
To achieve a soft and moist texture, you’ll need the following ingredients:
- All-Purpose or Cake Flour – Cake flour produces a lighter texture, while all-purpose flour gives more structure.
- Granulated Sugar – Adds sweetness and helps keep the cake soft.
- Unsalted Butter or Oil – Butter adds rich flavor, while oil makes the cake extra moist.
- Eggs – Provide structure and help create a fluffy cake.
- Baking Powder & Baking Soda – Essential for proper rising and a light texture.
- Milk or Buttermilk – Buttermilk gives a slight tang and helps tenderize the cake.
- Vanilla Extract – Enhances the cake’s flavor and complements the unicorn theme.
- Gel Food Coloring – For achieving the beautiful pastel cake layers (avoid liquid food coloring, as it alters the batter consistency).
3. Step-by-Step Guide to Making the Cake Batter
- Preparing Your Ingredients
- Bring eggs, butter, and milk to room temperature for even mixing.
- Preheat your oven to 350°F (175°C) and grease your cake pans.
- Creaming the Butter & Sugar
- In a large mixing bowl, beat butter and sugar together on medium speed until light and fluffy (about 3-5 minutes).
- This process creates air pockets in the batter, resulting in a softer cake.
- Adding Eggs One by One
- Add eggs one at a time, beating well after each addition.
- This helps maintain the structure and prevents the batter from curdling.
- Combining Dry Ingredients
- In a separate bowl, whisk together flour, baking powder, baking soda, and salt.
- This ensures the leavening agents are evenly distributedMixing Dry & Wet Ingredients Alternately
- Add the dry ingredients to the butter mixture in three parts, alternating with milk (or buttermilk).
- Begin and end with the dry ingredients to keep the batter balanced.
- Mix on low speed to avoid overmixing, which can lead to a dense cake.
4. Adding Color to the Cake Batter
A unicorn cake is all about pastel rainbow layers, so now it’s time to add vibrant colors!
- Divide the Batter
- Evenly divide the cake batter into 4 to 5 bowls, depending on how many colors you want.
- Common unicorn colors include pink, purple, blue, yellow, and mint green.
- Use Gel Food Coloring
- Add a few drops of gel food coloring to each bowl and gently fold it in.
- Avoid liquid food coloring, as it can thin out the batter and alter its consistency.
- Swirl or Layer the Batter
- For a layered effect: Pour each colored batter into separate cake pans for distinct pastel layers.
- For a swirl effect: Spoon different colors into the same pan and use a toothpick to swirl them together for a marbled look.
5. Pro Tips for the Best Cake Batter
- Do Not Overmix – Overmixing leads to a tough, dense cake. Stop mixing once the flour is incorporated.
- Use Room-Temperature Ingredients – This ensures even mixing and a smooth batter.
- Tap the Cake Pans – Before baking, tap the filled cake pans on the counter to remove air bubbles.
- Bake Immediately After Mixing – Letting the batter sit too long can cause the cake to be dense or not rise properly.
Baking & Assembling the Layers
Once your cake batter is beautifully colored and ready, it’s time to bake and assemble the layers to create a stunning, professional-looking unicorn cake. This step is crucial for ensuring that the cake has the right texture, structure, and aesthetic appeal. Whether you’re making a simple two-layer cake or an extravagant multi-tiered unicorn masterpiece, proper baking and layering techniques will ensure a flawless result.
1. Baking the Cake Layers to Perfection
- Preparing the Cake Pans
- Grease your cake pans with butter or non-stick spray, then lightly dust with flour. This prevents sticking.
- Alternatively, line the pans with parchment paper for an easy release.
- If baking multiple layers, use the same-size cake pans to ensure even layers.
- Pouring & Distributing the Batter
- If making solid color layers, pour each color into its own pan.
- If making a swirled unicorn cake, alternate spoonfuls of different colors into one pan and use a skewer to swirl them together.
- Baking the Cakes
- Preheat oven to 350°F (175°C) for an even bake.
- Place the cake pans in the center rack of the oven.
- Baking time:
- 6-inch layers: 20–25 minutes
- 8-inch layers: 25–30 minutes
- 9-inch layers: 30–35 minutes
- Rotate the pans halfway through baking for even heat distribution.
- Testing for Doneness
- Insert a toothpick or cake tester into the center of a cake—if it comes out clean, the cake is done.
- Lightly press the top of the cake—if it springs back, it’s fully baked.
- Cooling the Cake Layers
- Let cakes cool in the pans for 10–15 minutes before removing.
- Transfer to a wire rack and let them cool completely.
- Do NOT frost a warm cake—this will cause the frosting to melt and slide off!
2. Leveling & Trimming the Layers
Once the cakes are fully cooled, it’s time to prepare them for stacking.
Why Leveling is Important
- Uneven cakes can lean or collapse when layered.
- Flat layers provide a professional and polished look.
How to Level a Cake
- Use a serrated knife or cake leveler to slice off any domed tops.
- Trim each layer so they are even in height.
- If making a tall unicorn cake, consider cutting each layer in half to create more layers.
3. Assembling the Unicorn Cake Layers
Now comes the fun part—stacking and filling the layers to build a tall, impressive unicorn cake.
- Apply a Base Layer of Buttercream (Crumb Coat)
- Place the first cake layer on a cake board or turntable.
- Spread a thin layer of buttercream frosting on top using an offset spatula.
- Add the next cake layer and repeat the process until all layers are stacked.
- Crumb Coating (Optional but Recommended)
- A crumb coat is a thin layer of frosting that locks in crumbs and creates a smooth surface.
- Spread a very thin layer of buttercream over the entire cake.
- Chill in the refrigerator for 15–30 minutes to set before adding the final coat.
- Applying the Final Layer of Frosting
- Use an offset spatula to evenly spread a thick layer of buttercream over the cake.
- Smooth out the sides and top using a bench scraper or icing smoother.
- For a pastel ombré effect, blend different colors of buttercream around the cake.
4. Pro Tips for Assembling a Stable Unicorn Cake
- Chill Between Layers – If your cake feels wobbly, chill it for 15 minutes before adding more layers.
- Use a Turntable for Smoother Frosting – A rotating cake stand helps evenly spread frosting.
- Reinforce Tall Cakes with Dowels – If making a multi-tiered unicorn cake, insert cake dowels or straws for support.
- Freeze Cake Layers Before Assembling – This makes them easier to stack and frost without crumbs.
Making the Perfect Buttercream Frosting
A unicorn cake isn’t complete without rich, creamy buttercream frosting! It serves as both the glue that holds the layers together and the canvas for stunning decorations like the swirled mane, rosettes, and colorful piping. Whether you prefer a light and fluffy American buttercream or a silky-smooth Swiss meringue buttercream, this section will guide you through creating the perfect frosting for your unicorn cake.
1. Choosing the Right Type of Buttercream
Before diving into the recipe, let’s explore the different types of buttercream:
American Buttercream (Easiest & Most Popular)
- Made with butter, powdered sugar, vanilla extract, and milk/cream.
- Sweet, rich, and fluffy—perfect for decorating.
- Best for beginners and easy to customize with food coloring.
Swiss Meringue Buttercream (Silky & Less Sweet)
- Made by whipping egg whites and sugar into a meringue, then adding butter.
- Smoother and less sweet than American buttercream.
- Great for a more refined look and holds up well in warm weather.
Italian Meringue Buttercream (Most Stable & Professional)
- Made by pouring hot sugar syrup into beaten egg whites, then adding butter.
- Silky, stable, and not too sweet—ideal for intricate piping.
- More advanced technique but worth the effort.
For this unicorn cake, we’ll focus on American Buttercream because it’s easy to make, holds its shape well for piping decorations, and is loved by kids and adults alike.
2. Ingredients for the Perfect Buttercream
- 2 cups (4 sticks) unsalted butter, softened – Provides richness and a creamy texture.
- 4 cups powdered sugar (confectioners’ sugar) – Sweetens the frosting and gives structure.
- 2–4 tablespoons heavy cream or milk – Adjusts the consistency for spreading and piping.
- 2 teaspoons vanilla extract – Enhances flavor (or use almond or coconut extract for variety).
- Pinch of salt – Balances the sweetness and enhances flavors.
- Gel food coloring – For vibrant pastel unicorn colors (avoid liquid food coloring).
3. Step-by-Step Guide to Making Buttercream
- Whipping the Butter
- In a stand mixer with a paddle attachment (or using a hand mixer), beat the softened butter on medium speed for 2–3 minutes until it becomes pale and creamy.
- Scrape down the sides of the bowl to ensure an even texture.
- Adding the Powdered Sugar
- Gradually add the powdered sugar, one cup at a time, mixing on low speed to prevent a sugar cloud.
- Once fully incorporated, increase the speed to medium-high and beat for 2 more minutes.
- Adjusting the Consistency
- Add 2 tablespoons of heavy cream (or milk) to loosen the buttercream.
- Mix for 1-2 more minutes until light and fluffy.
- If the frosting is too thick, add more cream (1 tablespoon at a time).
- If it’s too thin, add a little more powdered sugar.
- Flavoring & Coloring
- Add vanilla extract and a pinch of salt to enhance the taste.
- Divide the buttercream into separate bowls for different unicorn mane colors.
- Use gel food coloring (pastel pink, purple, blue, yellow) and mix until evenly distributed.
4. How to Achieve the Perfect Buttercream Texture
- For a Fluffy Texture: Beat the frosting on high speed for 3-5 minutes to incorporate air.
- For a Smooth Finish: Use a spatula or bench scraper to spread evenly over the cake.
- For a Glossy Look: Add one extra tablespoon of heavy cream and mix on low speed.
5. Using Buttercream for Your Unicorn Cake
Creating the Unicorn Mane
- Fit piping bags with different star tips (Wilton 1M, 2D, or open star tips).
- Fill each bag with a different pastel color of buttercream.
- Pipe rosettes, swirls, and dollops to create a beautiful multi-colored mane.
Smoothing the Buttercream Base
- Apply a thin crumb coat first and chill the cake for 15–30 minutes.
- Spread a final layer of buttercream and smooth with a bench scraper.
Decorative Touches
- Add edible glitter, gold pearls, or sprinkles to enhance the magical unicorn look.
6. Pro Tips for Buttercream Success
- Use Softened Butter – If the butter is too cold, the frosting will be lumpy.
- Avoid Overbeating – Too much air can create bubbles in the frosting.
- Chill Before Piping – If the buttercream is too soft, refrigerate for 10-15 minutes before piping.
- Use Gel Food Coloring – Liquid food coloring can alter the buttercream consistency.
Crumb Coating & Final Frosting: Achieving a Flawless Finish
The crumb coat and final frosting are essential steps in creating a professional-looking unicorn cake. These techniques help ensure a smooth, polished appearance, making it easier to apply decorations like the unicorn mane, fondant details, and sprinkles. A well-executed frosting layer will make your cake look stunning and taste incredible!
1. What is a Crumb Coat & Why is It Important?
A crumb coat is a thin layer of frosting applied before the final coat. It seals in crumbs, preventing them from mixing into the outer layer of frosting. This step is crucial, especially for multi-layer cakes like the Unicorn Cake, where different colored cake layers may shed crumbs.
Benefits of a Crumb Coat:
- Locks in crumbs – Prevents a messy final layer of frosting.
- Creates a smooth base – Helps achieve a polished finish.
- Strengthens cake structure – Provides stability, especially for tall cakes.
- Prevents color bleeding – Useful when using different colored frostings.
2. How to Apply a Crumb Coat
- Preparing the Cake for Frosting
- Ensure the cake layers are completely cool before frosting.
- If necessary, trim the cake layers to make them even.
- Place the first cake layer on a turntable or cake stand.
- Spreading a Thin Layer of Buttercream
- Use an offset spatula to spread a thin layer of buttercream over the entire cake.
- Cover the top and sides lightly—this layer doesn’t need to be perfect.
- Don’t worry about crumbs; they’ll be trapped under the final frosting.
- Smoothing the Crumb Coat
- Use a bench scraper or icing smoother to smooth out the frosting.
- Thin out excess frosting so the crumb coat is just enough to seal in crumbs.
Step 4: Chilling the Cake
- Refrigerate the cake for 15–30 minutes until the crumb coat firms up.
- This helps the final frosting layer go on smoothly.
3. Applying the Final Layer of Frosting
Once the crumb coat is set, it’s time to apply the final coat of buttercream to create a beautiful and smooth surface.
- Spreading the Frosting Evenly
- Add a generous amount of buttercream to the top of the cake.
- Spread it evenly using an offset spatula.
- Covering the Sides
- Apply a thick layer of buttercream around the sides.
- Use a bench scraper to smooth it out, rotating the cake on the turntable.
- Achieving a Super Smooth Finish
- Hold the bench scraper at a slight angle and rotate the turntable while gently scraping away excess frosting.
- For an ultra-smooth look, dip the scraper in warm water, dry it, and smooth the frosting again.
- Perfecting the Edges
- Smooth the top edges using the offset spatula.
- If needed, chill the cake for 10–15 minutes and make final touch-ups.
4. Creative Frosting Techniques for a Unicorn Cake
While a smooth frosting base is perfect, you can also try these fun textures and designs for added magic:
- Pastel Ombré Effect – Blend different pastel colors into each other using a spatula.
- Textured Swirls – Use a spoon or spatula to create rustic swirls.
- Striped or Marbled Look – Use different frosting colors and drag a skewer through them.
5. Pro Tips for the Perfect Frosting Finish
- Chill Between Steps – Let each layer set in the fridge before adding more frosting.
- Use a Turntable – This helps achieve smooth and even frosting application.
- Fix Air Bubbles – If you notice air bubbles in the buttercream, smooth them out with a warm spatula.
- Practice Makes Perfect – Don’t stress over minor imperfections—decorations will cover them up!
Decorating Your Unicorn Cake Like a Pro
Piping the Unicorn Mane
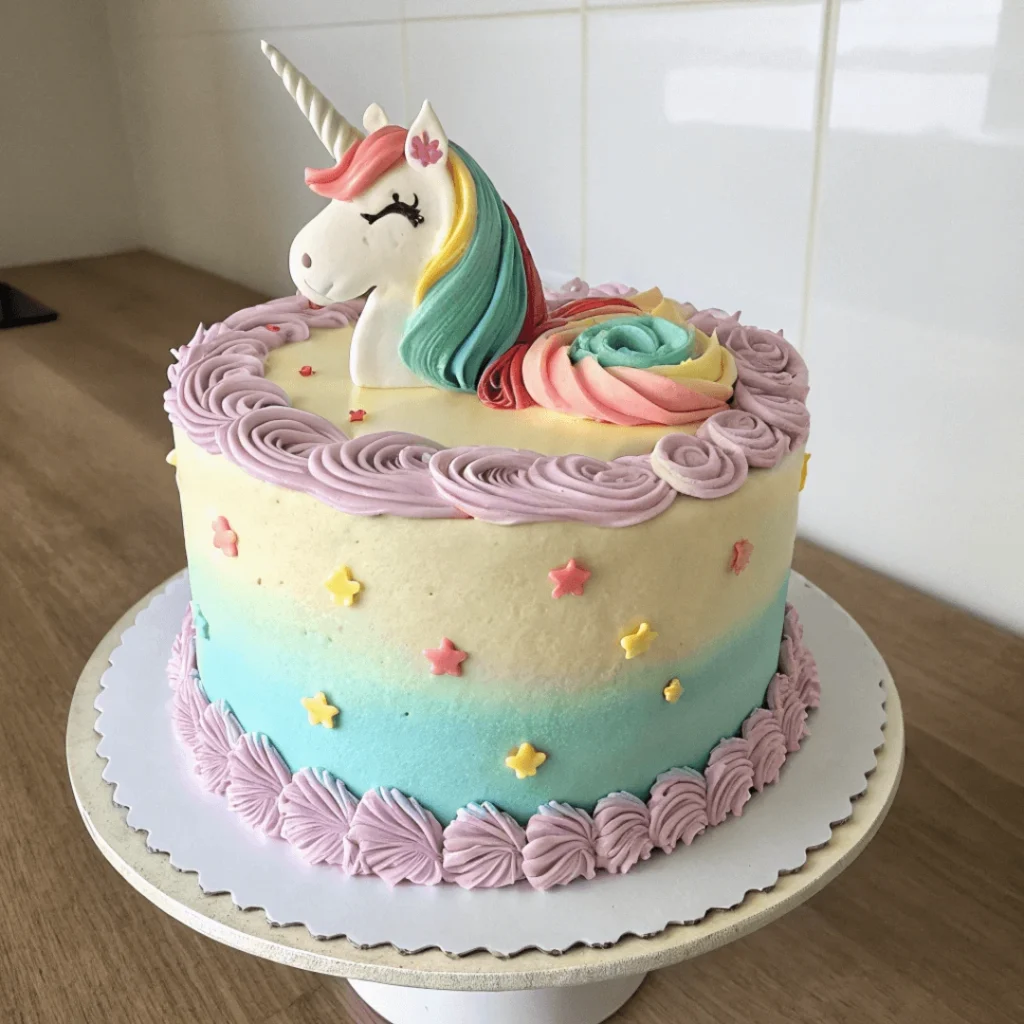
The unicorn mane is the highlight of the cake, bringing it to life with beautiful swirls, rosettes, and delicate piping in dreamy pastel colors. This step transforms a simple frosted cake into a stunning fantasy dessert that looks straight out of a fairy tale! Whether you choose soft ombré tones or bold rainbow hues, this section will guide you through the best techniques for achieving a perfectly piped unicorn mane.
1. Choosing the Right Buttercream for Piping
For a perfect unicorn mane, you’ll need a buttercream that holds its shape when piped. The best choices are:
- American Buttercream – Easiest to make, stiff enough for detailed piping.
- Swiss Meringue Buttercream – Smooth and elegant, but softer for intricate designs.
- Italian Meringue Buttercream – Silky and professional-looking, great for warm weather.
2. Preparing the Colors for the Mane
- Selecting Your Color Palette
A unicorn mane typically features pastel or bright rainbow colors. Some popular color combinations include:
- Classic Pastel – Pink, purple, blue, and yellow
- Bold & Bright – Hot pink, teal, gold, and purple
- Ombré Effect – Blending two or three shades per piping bag
- Coloring the Buttercream
- Divide the buttercream into separate bowls (one per color).
- Use gel food coloring (not liquid) to achieve vibrant colors without affecting consistency.
- Mix each color thoroughly to ensure even distribution.
3. Choosing the Best Piping Tips for a Beautiful Mane
Different piping tips create different textures and styles. Here are the most popular ones for a unicorn mane:
- Wilton 1M (Large Star Tip) – Perfect for rosettes and big swirls.
- Wilton 2D (Closed Star Tip) – Creates soft, ruffled flowers and swirls.
- Wilton 4B (Open Star Tip) – Great for thick, textured stars.
- Round Tip (Wilton #12) – Best for teardrop shapes or smooth dots.
4. Piping the Unicorn Mane Step-by-Step
- Arranging the Mane Placement
- The mane should start at the top of the head, flowing down one side of the cake.
- It should also cover the back of the cake for a full, flowing look.
- Optionally, you can add a few rosettes or swirls at the base of the unicorn’s horn.
- Piping Rosettes & Swirls
- Hold the piping bag vertically above the cake.
- Pipe a rosette by starting in the center and spiraling outward.
- For swirls, apply even pressure and release at the tip for a fluffy effect.
- Adding Stars & Textures
- Use an open star tip (Wilton 4B) to pipe small star bursts between rosettes.
- Use a round tip to pipe small dots or teardrop shapes for added texture.
5. Adding the Final Magical Touches
Now that the mane is piped, add extra details to make it sparkle!
- Edible Glitter or Luster Dust – For a shimmering effect.
- Gold or Silver Dragees – Add small edible pearls between swirls.
- Sprinkles or Confetti Sugar Pearls – Enhance the colorful, whimsical look.
6. Pro Tips for a Stunning Unicorn Mane
- Chill Your Piping Bags – If buttercream gets too soft, chill the bags for 5–10 minutes.
- Use a Rotating Cake Stand – This helps you pipe the mane smoothly without awkward angles.
- Practice First – Test your piping technique on parchment paper before applying it to the cake.
- Mix Colors for a Unique Look – Try loading two or three colors into one piping bag for a rainbow swirl effect.
Creating Fondant Unicorn Ears & Horn
The unicorn ears and horn are the signature features that give your unicorn cake its enchanting look. Made from fondant or gum paste, these elements add a 3D effect and transform a simple cake into a magical centerpiece. With the right techniques, you can craft sturdy, elegant, and realistic unicorn features that look just as good as professional bakery creations!
1. Choosing the Right Material: Fondant vs. Gum Paste
Before you start, it’s important to pick the right edible material for shaping the ears and horn:
| Material | Best for | Texture | Drying Time |
|---|---|---|---|
| Fondant | Soft, flexible decorations | Smooth, pliable | Slower drying, stays soft longer |
| Gum Paste | Firm, sturdy decorations | Dries harder | Faster drying, great for structure |
| Fondant + Tylose Powder | Best of both worlds | Flexible but dries firm | Faster drying than plain fondant |
2. Making the Fondant Unicorn Horn
The unicorn horn is the main focal point of the cake, adding height and elegance. To make it stand tall and sturdy, follow these steps:
- Preparing the Fondant
- Knead a small amount of white or ivory fondant until smooth.
- If needed, add Tylose powder for firmness.
- Shaping the Horn
- Roll the fondant into a long, even rope (about 6–8 inches long).
- Taper one end to create a pointed tip (this will be the top of the horn).
- Fold the rope in half, then twist the two strands together in a spiral shape.
- Gently press and smooth the horn to refine the shape.
- Reinforcing the Horn (So It Stands Upright)
- Insert a wooden skewer or thick straw into the base of the horn.
- Let it dry for 12–24 hours to harden before placing it on the cake.
- Adding a Golden Finish
For a shimmering gold horn, use one of these techniques:
- Gold Luster Dust + Vodka – Mix gold luster dust with a few drops of vodka (or lemon extract) and paint the horn with a food-safe brush.
- Edible Gold Spray – A quick and even way to add a golden effect.
- Gold Fondant – Use pre-colored gold fondant or dust the fondant with edible shimmer powder.
3. Making the Fondant Unicorn Ears
The unicorn ears add symmetry and complete the face. They should be proportional to the horn and stand upright without drooping.
- Rolling & Cutting the Ears
- Roll out white fondant to about ¼ inch thickness.
- Use a teardrop-shaped cutter (or hand-cut with a knife) to make two large ear shapes.
- Roll out pink fondant thinner than the white and cut smaller teardrop shapes to create the inner ear details.
- Shaping & Adding Dimension
- Slightly fold or pinch the base of each ear to give it a natural curved shape.
- Attach the pink inner ear onto the white fondant using a small brush and water or edible glue.
- Place the ears in small bowls or curved molds to help them hold their shape while drying.
- Drying & Reinforcing the Ears
- Let the ears dry for at least 6–12 hours before placing them on the cake.
- If you need extra support, insert a toothpick or small piece of spaghetti into the base of each ear.
4. Attaching the Horn & Ears to the Cake
Once the ears and horn are dry and sturdy, it’s time to place them on the cake!
Step 1: Inserting the Horn
- Carefully insert the skewer of the horn into the center of the cake.
- Push it down until secure and stable (make sure it doesn’t lean).
Step 2: Positioning the Ears
- Attach the ears on either side of the horn, slightly angled outward.
- If needed, use extra buttercream or melted white chocolate to hold them in place.
5. Adding Final Magical Touches
- Edible Glitter or Luster Dust – Brush over the ears for a subtle shimmer.
- Small Fondant Flowers – Decorate around the base of the horn for a softer look.
- Pearl or Gold Sprinkles – Add extra details to match the mane and horn.
Adding Sparkle with Edible Glitter & Sprinkles
The final step in creating a stunning unicorn cake is adding sparkle and shimmer with edible glitter, sprinkles, and other decorative elements. These finishing touches elevate your cake’s design, making it look even more enchanting and magical. Whether you prefer a subtle shimmer or a bold, dazzling effect, this section will guide you through the best ways to add that extra touch of unicorn magic!
1. Choosing the Best Edible Glitters & Sprinkles
Not all glitter and sprinkles are created equal—some are purely decorative and not safe for consumption. To ensure your decorations are completely edible, use the following types:
| Type | Best For | Appearance | Edible? |
|---|---|---|---|
| Edible Luster Dust | Painting accents (horn, ears, mane) | Shimmery, metallic finish | Yes |
| Edible Glitter | Sprinkling over the cake | Fine sparkle, subtle shine | Yes |
| Disco Dust | Extreme shimmer | Very fine, high sparkle | Semi-edible (non-toxic but not digestible) |
| Sanding Sugar | Adding texture to the mane | Crystallized, light-reflective | Yes |
| Pearlized Sprinkles | Decorating around the mane & base | Shiny, pearl-like beads | Yes |
| Gold & Silver Dragees | Adding metallic details | Hard, glossy metallic balls | Some may be non-edible |
2. Applying Edible Glitter for a Shimmering Effect
Method 1: Dry Dusting for a Soft Glow
- Dip a soft, fluffy food-safe brush into edible luster dust or fine edible glitter.
- Gently dust the glitter over the cake for a subtle shimmering effect.
- This works best on buttercream, fondant, or chocolate decorations.
Method 2: Wet Application for Intense Shine
- Mix edible luster dust with a few drops of vodka or clear lemon extract (this evaporates quickly).
- Use a food-safe paintbrush to apply a metallic sheen on the unicorn horn, ears, and mane.
- Let it dry for 10–15 minutes before handling.
3. Decorating with Sprinkles for Extra Texture
Sprinkles add both texture and visual appeal to your unicorn cake. Here are some creative ways to use them:
A. Adding Sprinkles to the Unicorn Mane
- Lightly press pastel sprinkles, sugar pearls, or sanding sugar onto the piped buttercream mane.
- This adds a whimsical, textured effect that enhances the mane’s beauty.
B. Creating a Sprinkle Border
- To make the cake’s base look more polished, create a sprinkle border around the bottom edge.
- Gently press rainbow jimmies, pearl sprinkles, or gold sanding sugar into the frosting at the base.
C. Using Gold & Silver Dragees for a Luxe Touch
- Scatter gold and silver dragees throughout the mane for a jewel-like effect.
- Be mindful that some larger dragees may be hard to bite, so use them sparingly.
4. Using Edible Glitter Spray for an All-Over Glow
If you want your unicorn cake to shimmer from every angle, try an edible glitter spray!
How to Use Glitter Spray:
- Hold the spray 6–8 inches away from the cake.
- Lightly mist over the entire cake for a soft, all-over shimmer.
- For a concentrated sparkle, apply extra layers (letting each layer dry for a few minutes).
Best Edible Glitter Sprays for Cakes:
- Wilton Color Mist (gold, silver, pearl)
- PME Edible Lustre Spray
- Chefmaster Edible Glitter Spray
5. Creative Ways to Add Extra Magic
- Unicorn “Stardust” Effect – Flick a dry brush with edible glitter over the cake for a twinkling dust effect.
- Rainbow Sprinkle Explosion – Cut a small section inside the cake and fill it with colorful sprinkles for a surprise when sliced!
- Ombre Glitter Gradient – Apply a heavier layer of glitter on top and fade it out towards the base for an ombré effect.
Placing the Unicorn Cake Topper & Final Touches
Now that your unicorn cake is beautifully frosted, decorated with a flowing buttercream mane, and shimmering with edible glitter, it’s time for the final step—placing the unicorn cake topper and adding those last magical details. This step will bring your unicorn cake to life, making it look as if it just stepped out of a fairytale.
1. Choosing the Right Unicorn Cake Topper
A cake topper is the finishing touch that enhances the theme of your cake. Depending on your style, you can use an edible topper made of fondant or chocolate, or a non-edible topper like a paper or plastic unicorn figurine.
Types of Unicorn Cake Toppers
| Topper Type | Material | Best For | Reusable? |
|---|---|---|---|
| Fondant Unicorn Horn & Ears | Handmade fondant or gum paste | Fully edible decoration | ❌ No |
| Chocolate Horn & Ears | Molded white chocolate, painted gold | Tasty alternative to fondant | ❌ No |
| Paper or Cardstock Topper | Pre-made or DIY printable unicorn topper | Simple and lightweight | ✅ Yes |
| Acrylic or Plastic Topper | Durable and stylish store-bought topper | Reusable decoration | ✅ Yes |
| Edible Printed Wafer Paper | Thin edible images of unicorn designs | Lightweight and easy to place | ❌ No |
2. Placing the Unicorn Cake Topper
Once you have chosen your topper, it’s time to position it correctly on the cake.
Step 1: Positioning the Unicorn Horn
- Place the horn in the center of the cake, slightly tilting it forward for a playful look.
- If using a fondant or chocolate horn, insert a wooden skewer or straw inside for support before placing it.
- Press it gently but firmly to ensure it stays in place.
Step 2: Attaching the Unicorn Ears
- Position the ears symmetrically on both sides of the horn, angling them slightly outward.
- If using fondant ears, insert toothpicks or small skewers at the base before securing them.
- Press lightly to make sure they adhere properly.
Step 3: Adding Facial Features (Optional)
- If you want to add a cute unicorn face, use one of these methods:
- Edible black gel or fondant to create closed eyes with long eyelashes.
- Hand-drawn details using a food-safe marker.
- Printed edible wafer paper features for an easy solution.
3. Adding Final Decorative Touches
Now that the unicorn topper is in place, it’s time to enhance the overall presentation with additional decorations.
A. Enhancing the Mane with Extra Details
- Add small fondant flowers or buttercream rosettes around the unicorn’s mane.
- Use pastel-colored sprinkles to make the mane more vibrant.
- Add gold pearls or dragees for an extra touch of elegance.
B. Dusting with Edible Glitter for a Magical Glow
- Lightly dust the entire cake with edible shimmer or luster dust for a dreamy effect.
- Use gold or silver edible spray for a professional, polished finish.
C. Creating a Starry Background (Optional)
- If making a multi-tiered unicorn cake, place gold fondant stars or edible glittery stars around the cake.
- For a galaxy-inspired look, use an ombre effect with pastel-colored buttercream as the background.
4. Presenting & Serving the Unicorn Cake
Once your unicorn cake is fully assembled and sparkling with magic, it’s time to showcase it!
A. The Perfect Cake Display
- Place the cake on a cake stand or decorative platter to elevate its appearance.
- If serving at a birthday party, surround it with matching unicorn-themed cupcakes or cookies.
B. Taking Beautiful Photos
- Capture the cake from multiple angles to highlight all the details.
- Use soft natural lighting for the best effect.
- Add a colorful background or party decorations to make the cake stand out.
C. Slicing & Serving the Cake
- Use a sharp serrated knife to slice through the buttercream and fondant cleanly.
- Serve with matching pastel plates and napkins for a picture-perfect moment.
5. Pro Tips for a Perfect Unicorn Cake Topper Placement
- Place the topper last – This prevents it from shifting while decorating.
- Reinforce fondant pieces – Use skewers or toothpicks inside edible toppers for better stability.
- Keep proportions balanced – The horn should be taller than the ears, but not too oversized.
- Secure decorations with melted chocolate – A strong, edible glue alternative for fondant details.
- Match colors with the overall cake theme – Stick to pastel or gold tones for a cohesive look.
Pro Tips for a Stunning & Tasty Unicorn Cake
Best Food Coloring for Vibrant Colors
Creating a stunning unicorn cake means using bright, bold, and pastel colors that bring the magic to life. Whether you’re coloring buttercream, fondant, or cake batter, choosing the right food coloring is essential to achieving the most vibrant hues without affecting taste or texture.
1. Types of Food Coloring: Which One to Choose?
Not all food colorings are the same. Some provide richer pigmentation, while others may cause texture issues if used improperly. Here’s a breakdown of the best food coloring types for a unicorn cake:
| Type | Best For | Advantages | Disadvantages |
|---|---|---|---|
| Gel Food Coloring | Buttercream, fondant, cake batter | Highly pigmented, vibrant, requires only a small amount | Can be harder to mix evenly |
| Liquid Food Coloring | Light batters, beverages | Easy to mix, widely available | Weak pigmentation, can thin out frosting |
| Powdered Food Coloring | Chocolate, royal icing, dry mixes | Strong pigmentation, no added moisture | Harder to dissolve, requires alcohol for best results |
| Oil-Based Food Coloring | Candy melts, chocolate | Specifically designed for fat-based ingredients | Not ideal for water-based recipes like frosting |
2. Best Food Coloring Brands for Intense & Pastel Colors
If you want rich, vibrant unicorn colors, choosing high-quality food coloring brands is key. Here are some top-rated food colorings used by professional bakers:
Best Gel Food Coloring Brands
AmeriColor Soft Gel Paste – Highly concentrated, easy to blend
Wilton Gel Colors – Widely available, good pigmentation
Chefmaster Liqua-Gel – Vibrant, easy to control consistency
Best Powdered Food Coloring
Suncore Foods Powdered Colors – Natural, plant-based options
Wilton Color Dust – Great for subtle pastel effects
Best Oil-Based Coloring (For Chocolate & Candy Melts)
Colour Mill Oil-Based Colors – Works well in high-fat ingredients
Wilton Candy Colors – Made specifically for chocolate
3. How to Mix Colors for the Perfect Unicorn Palette
A unicorn cake is all about dreamy pastel colors or bright rainbow hues. Here’s how to mix the best shades:
| Color Needed | Mix These Shades |
|---|---|
| Pastel Pink | 1 drop pink + white |
| Lavender Purple | 1 drop purple + tiny drop pink |
| Mint Green | 1 drop green + a touch of yellow |
| Sky Blue | 1 drop blue + a touch of white |
| Sunset Orange | 1 drop orange + a touch of red |
Blending Tips for a Smooth Color Finish
- Add color gradually – Start with a small amount, then increase if needed.
- Mix thoroughly – Ensure there are no streaks in buttercream or fondant.
- Let colors develop – Some shades deepen over time, so wait a few minutes before adjusting.
4. Avoiding Common Food Coloring Mistakes
Even the best food coloring can cause problems if not used correctly. Here are common mistakes and how to fix them:
Using Too Much Coloring
- Issue: Can make buttercream bitter or cause fondant to become sticky.
- Fix: Always start with a small amount and build up gradually.
Colors Fading Over Time
- Issue: Some colors (especially purples & blues) fade when exposed to light.
- Fix: Store cakes in a cool, dark place, and use color-stabilizing ingredients (like a pinch of citric acid for purples).
Uneven Color Distribution
- Issue: Streaks in buttercream or fondant.
- Fix: Let the coloring fully incorporate by mixing well with a spatula or stand mixer.
How to Achieve a Smooth Buttercream Finish
A smooth buttercream finish is the foundation of a beautifully decorated unicorn cake. Whether you’re creating a sleek, polished look or a base for intricate piping, achieving a perfectly smooth buttercream surface requires the right techniques, tools, and patience. Here’s how you can get that professional bakery-quality finish at home!
1. Choosing the Right Buttercream for a Smooth Finish
Not all buttercreams are equally suited for a flawless, smooth finish. The consistency and texture of your frosting play a major role in how well it spreads and sets on your cake.
Best Buttercream Types for a Smooth Finish:
| Buttercream Type | Texture & Best Use | Pros | Cons |
|---|---|---|---|
| Swiss Meringue Buttercream (SMBC) | Silky, smooth, stable | Light & creamy, easy to smooth | Requires extra time to make |
| American Buttercream (ABC) | Thick, creamy, slightly crusting | Easy to make, holds color well | Can be too sweet, sometimes grainy |
| Italian Meringue Buttercream (IMBC) | Smooth, stable, not overly sweet | Light texture, excellent for smoothing | More complex to prepare |
| Ermine Buttercream | Fluffy, velvety | Not too sweet, smooths well | Less stable in warm temperatures |
2. Preparing the Cake for Buttercream Application
Before applying buttercream, proper cake preparation is crucial for an even and professional finish.
A. Leveling the Cake Layers
- Trim any domed tops with a serrated knife or cake leveler.
- Make sure each layer is flat and even for a stable structure.
- Brush a thin layer of simple syrup on the cake layers to prevent dryness.
B. Chilling the Cake Layers
- Chill the cake layers for at least 30 minutes before frosting.
- A slightly firm cake helps buttercream spread more smoothly.
3. Applying the Crumb Coat for a Clean Base
A crumb coat is a thin first layer of buttercream that seals in loose crumbs, creating a clean base for the final coat.
Steps for a Perfect Crumb Coat:
- Use a thin buttercream layer – Apply a small amount to lock in crumbs.
- Spread evenly with an offset spatula – Cover the entire cake with a thin, even layer.
- Chill the cake for 15–30 minutes – Let the crumb coat firm up before applying the final layer.
4. Techniques for a Flawless Buttercream Finish
A. The Offset Spatula & Bench Scraper Method
- Apply a generous amount of buttercream – Start from the top, then work your way down the sides.
- Smooth with an offset spatula – Spread evenly in circular motions.
- Use a bench scraper – Hold it at a 45-degree angle against the cake while slowly rotating the turntable.
- Fill in any gaps – Apply more buttercream where needed and repeat smoothing.
B. The Hot Spatula Technique
- Dip an offset spatula or bench scraper in hot water, then dry it.
- Glide it over the buttercream to create an ultra-smooth finish.
- Repeat as necessary, reheating the spatula when needed.
C. The Viva Paper Towel Method (For Crusting Buttercream)
- Let the buttercream set for 10–15 minutes until it forms a slight crust.
- Place a clean Viva paper towel on the cake surface.
- Gently rub with your hand or a fondant smoother for a polished look.
5. Fixing Common Buttercream Smoothing Mistakes
Even with the best techniques, buttercream can sometimes be tricky to work with. Here’s how to fix common issues:
| Problem | Cause | Fix |
|---|---|---|
| Air bubbles in buttercream | Over-whipping the frosting | Gently stir with a spatula to remove air pockets before applying |
| Uneven buttercream layers | Applying too much or too little in some areas | Use a bench scraper to smooth and distribute evenly |
| Buttercream too soft | Warm kitchen temperature or over-mixed frosting | Chill buttercream for 10–15 minutes before applying |
| Buttercream pulling crumbs | Skipping the crumb coat or applying too much pressure | Always use a crumb coat first and apply gentle strokes |
6. The Final Touch: Polishing the Cake for Perfection
- Once the buttercream is smooth, do a final inspection and touch-up:
- Check for any uneven spots and fix them with an offset spatula.
- If needed, chill the cake again and smooth one last time.
- Add a soft dusting of edible glitter or a touch of luster dust for a flawless, glowing finish.
Common Mistakes to Avoid When Decorating
Decorating a unicorn cake can be a fun and rewarding experience, but even experienced bakers can run into challenges. From buttercream mishaps to fondant issues, small mistakes can impact the final look of your cake. Here’s a detailed guide on the most common decorating mistakes and how to avoid them for a flawless, professional-looking unicorn cake.
1. Using the Wrong Frosting Consistency
The consistency of your buttercream or frosting plays a crucial role in achieving smooth finishes and clean piping details.
Common Mistakes:
- Frosting is too stiff → Hard to spread, uneven texture, rough edges.
- Frosting is too runny → Slides off the cake, doesn’t hold piping details.
How to Fix It:
✔ For smooth spreading: Add a few teaspoons of milk or cream to soften stiff buttercream.
✔ For firm piping consistency: Add powdered sugar or chill the frosting for a few minutes.
✔ Test before using: Pipe a small section to ensure the right consistency.
2. Skipping the Crumb Coat
A crumb coat is a thin layer of frosting that traps cake crumbs before applying the final coat. Without it, crumbs can mix into the buttercream, creating a messy, uneven surface.
Common Mistakes:
- Skipping the crumb coat entirely → Visible cake crumbs in the final frosting.
- Applying too much pressure → Causes crumbs to lift and spread.
How to Fix It:
✔ Apply a thin layer of buttercream as a crumb coat.
✔ Chill the cake for 15–30 minutes before applying the final coat.
✔ Use a bench scraper to smooth the buttercream evenly.
3. Uneven or Crooked Cake Layers
A unicorn cake should have stable and even layers to support decorations like the fondant horn, ears, and mane.
Common Mistakes:
- Not leveling the cake layers → Uneven cake height and stability issues.
- Stacking warm cake layers → Causes the cake to sink or slide.
- Using too much filling between layers → Makes the cake wobbly.
How to Fix It:
✔ Level each cake layer with a serrated knife or cake leveler.
✔ Chill cake layers before assembling to make stacking easier.
✔ Use even amounts of filling and press down lightly when stacking.
4. Piping the Unicorn Mane Incorrectly
The unicorn’s mane is a signature feature of the cake, but improper piping can lead to uneven swirls, air bubbles, or color bleeding.
Common Mistakes:
- Holding the piping bag at the wrong angle → Uneven mane.
- Using runny buttercream → Mane lacks definition.
- Not testing color combinations → Colors may blend unintentionally.
How to Fix It:
✔ Hold the piping bag at a 90-degree angle for perfect swirls.
✔ Use firm but smooth pressure while piping.
✔ Chill buttercream slightly before piping intricate details.
✔ Test colors on a separate plate before decorating the cake.
5. Placing Fondant Decorations Too Early or Incorrectly
Fondant elements like the unicorn horn, ears, and eyes need to be placed at the right time and with proper support.
Common Mistakes:
- Attaching fondant pieces too early → They may slide or droop.
- Not letting fondant decorations dry → Soft decorations lose shape.
- Using too much water to attach fondant → Can cause decorations to dissolve.
How to Fix It:
✔ Let fondant decorations harden for a few hours before placing them on the cake.
✔ Use edible glue or melted chocolate instead of water for secure attachment.
✔ Insert a toothpick or skewer into the unicorn horn for extra support.
Final Thoughts: Mastering Unicorn Cake Decoration
By avoiding these common decorating mistakes, you’ll create a gorgeous, professional-quality unicorn cake that’s picture-perfect and celebration-ready!
- Prepare your cake layers properly
- Use the right buttercream consistency
- Apply a crumb coat for a clean finish
- Take your time with piping and decorations
With these tips, your unicorn cake will look magical and flawless every time!
Now that you have all the steps and tips to create your own stunning unicorn cake, it’s time to get creative and bring your cake to life! Whether you’re baking for a special occasion or just want to add a fun touch to your dessert table, this vibrant and whimsical cake will surely be the star of the show. With these easy-to-follow instructions, even beginner bakers can master this enchanting treat. Happy baking, and don’t forget to share your magical creations with us!